# Purpose
The user guide provides brief description about :
Devnagri
User Dashboard
Glossary
DOTA Web
DOTA Mobile App
# Devnagri
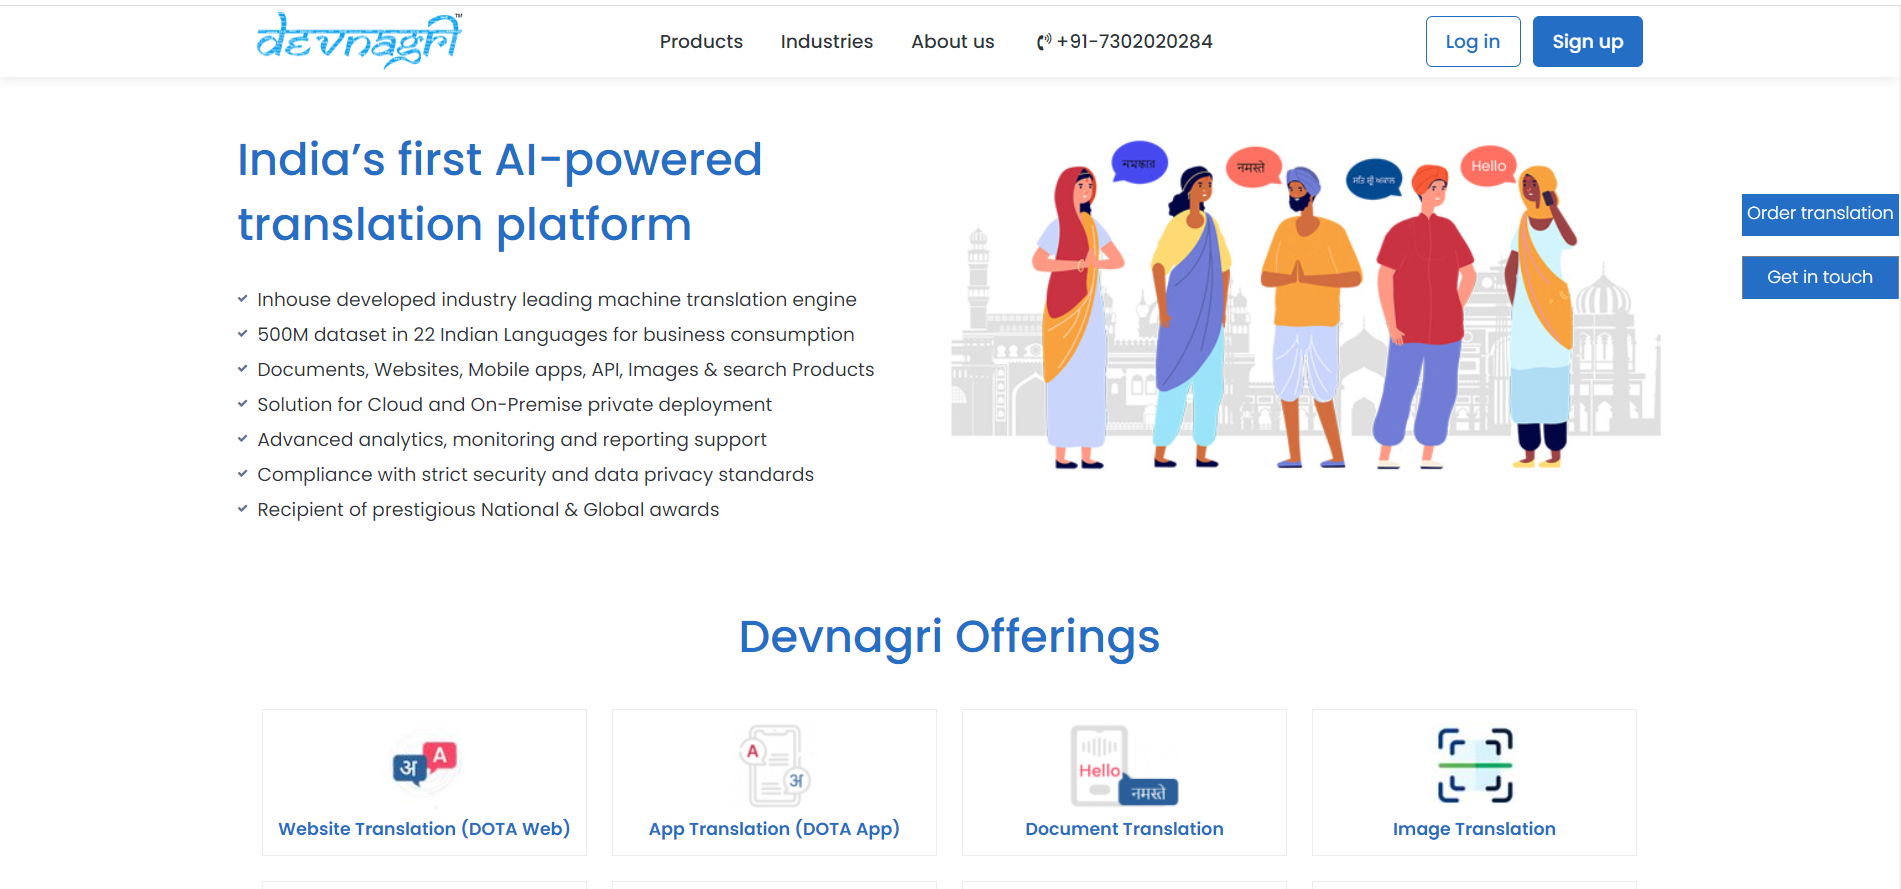
Devnagri is India's first AI-powered translation platform to help customers communicate to their endusers in the language they understand. This manual will help in understanding the functionalities of the system. You may follow these steps to place a translation order.
# Getting Started With Devnagri
On the homepage of the Devangri (opens new window) there is an option of “Order Translation”. By clicking on the option user will be redirected to the Login page.
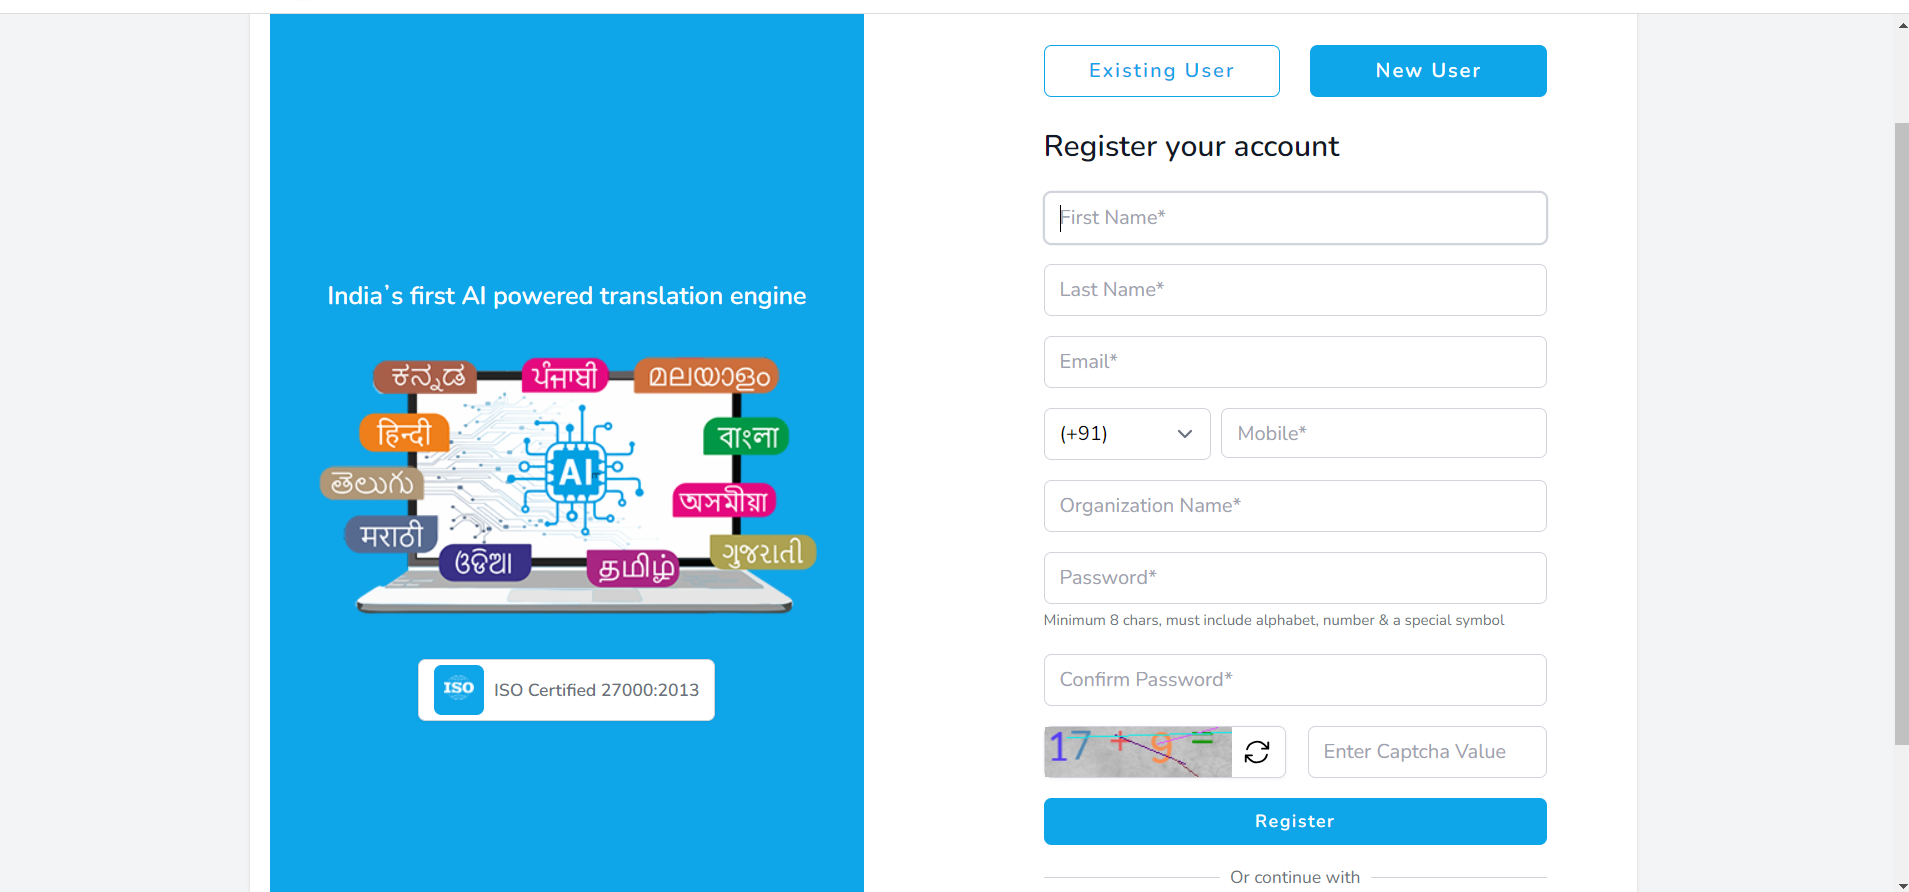
# NOTE: User need to sign-up/sign-in before Placing an order
On the login page, user has the option to register (opens new window) by submitting the necessary information (including Name, Company, Industry, Email ID, Mobile Number, and Password) in the registration form.
Once the complete details are filled, click on the “Register” button, a verification email will be sent on the registered email.
After clicking the "Register" button, the user will be logged in and directed to the following screen.
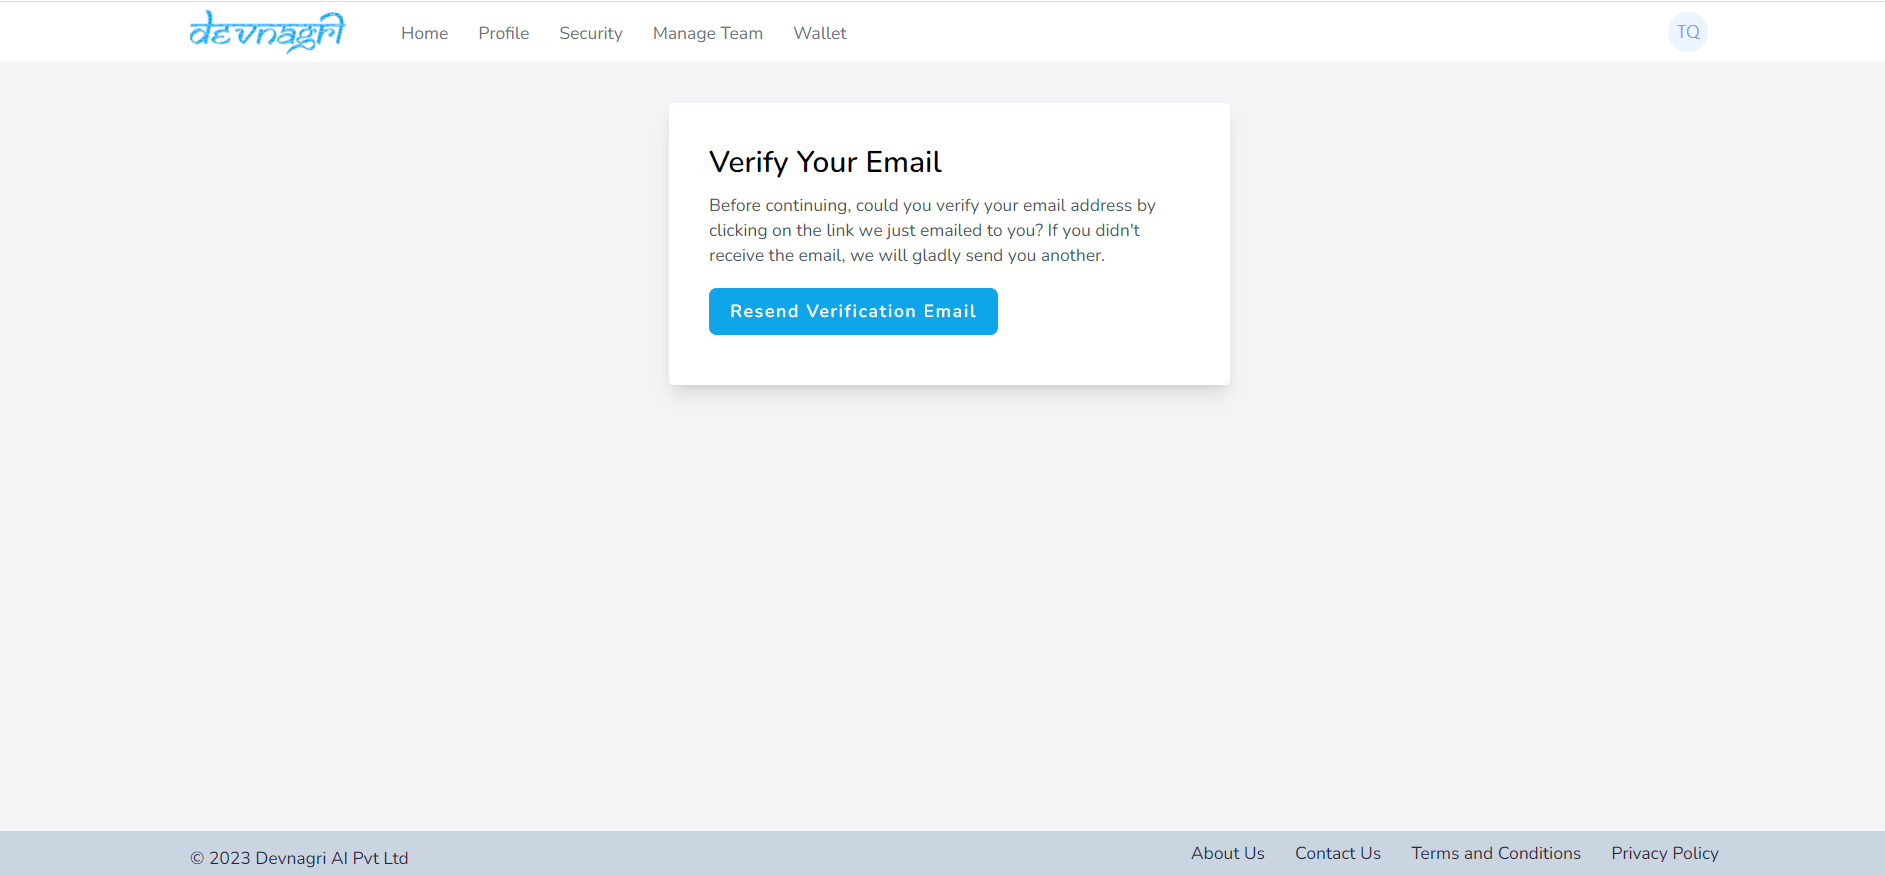
To complete the registration process, please click the "Verify Email Address" button.
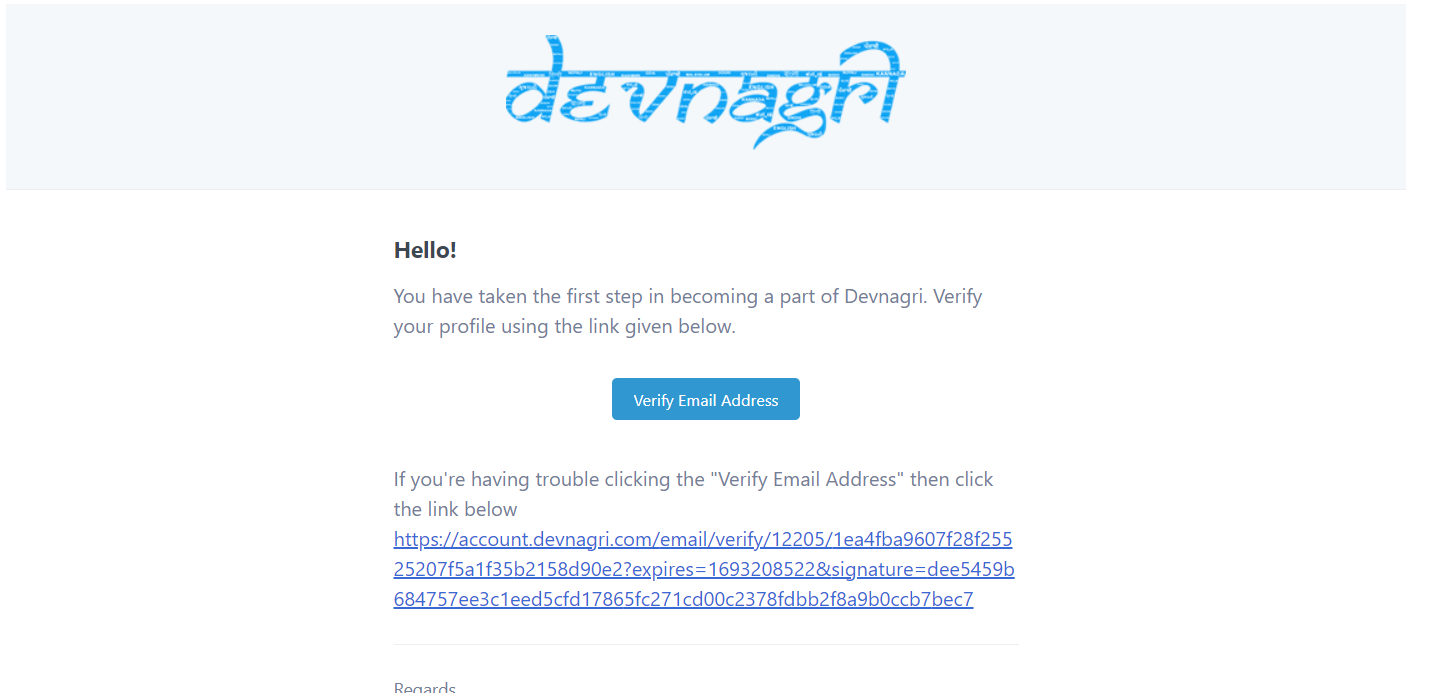
Once the registration process is completed, you will be automatically redirected to the user dashboard screen.
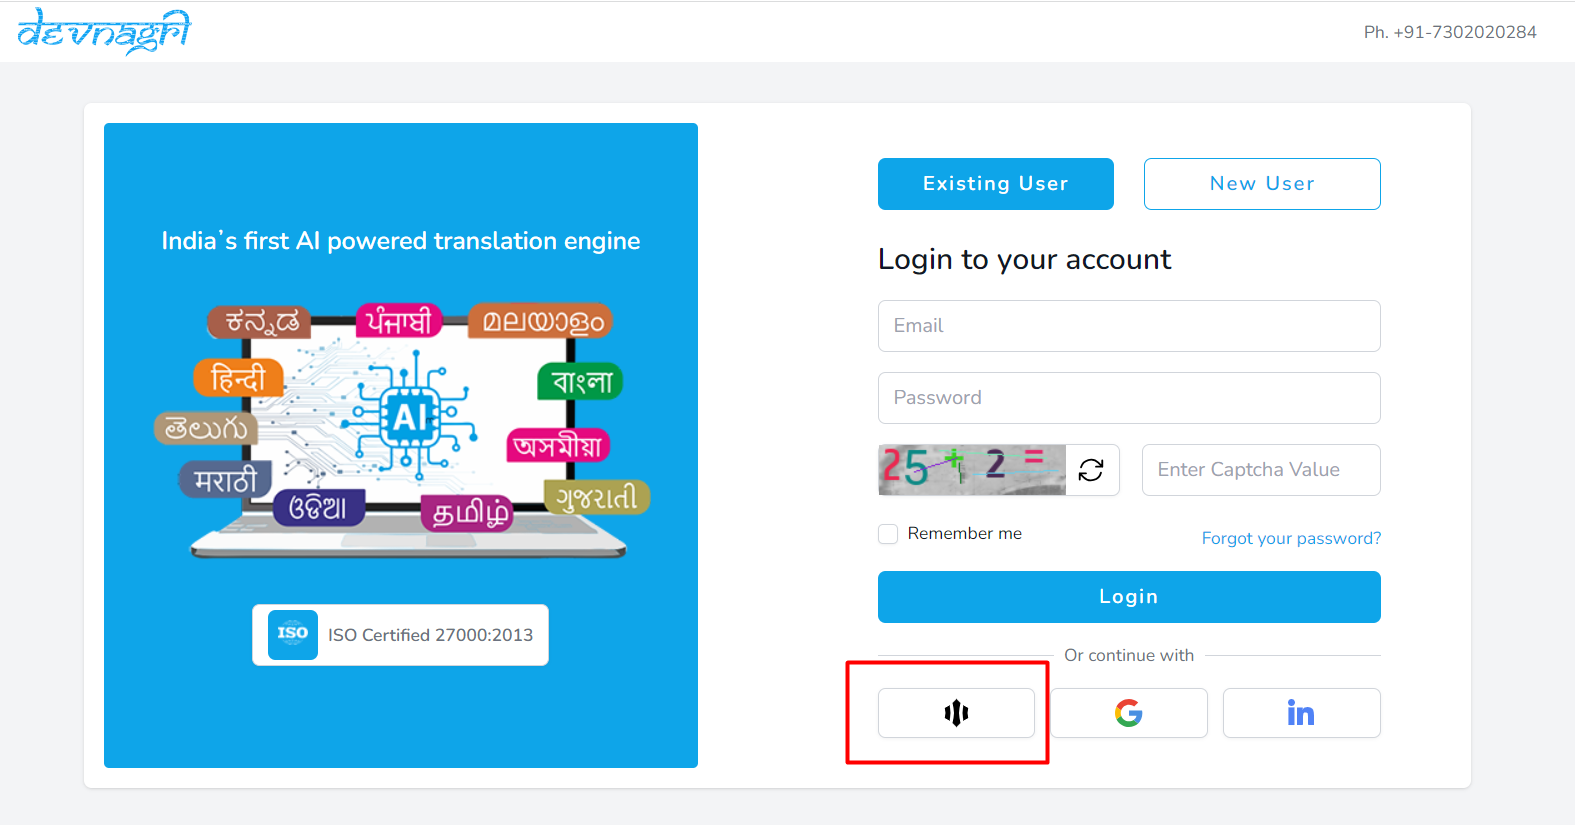
# Logging In
- User can login (opens new window) to Devnagri by using credentials (Email ID & password) that were set during the registration process.
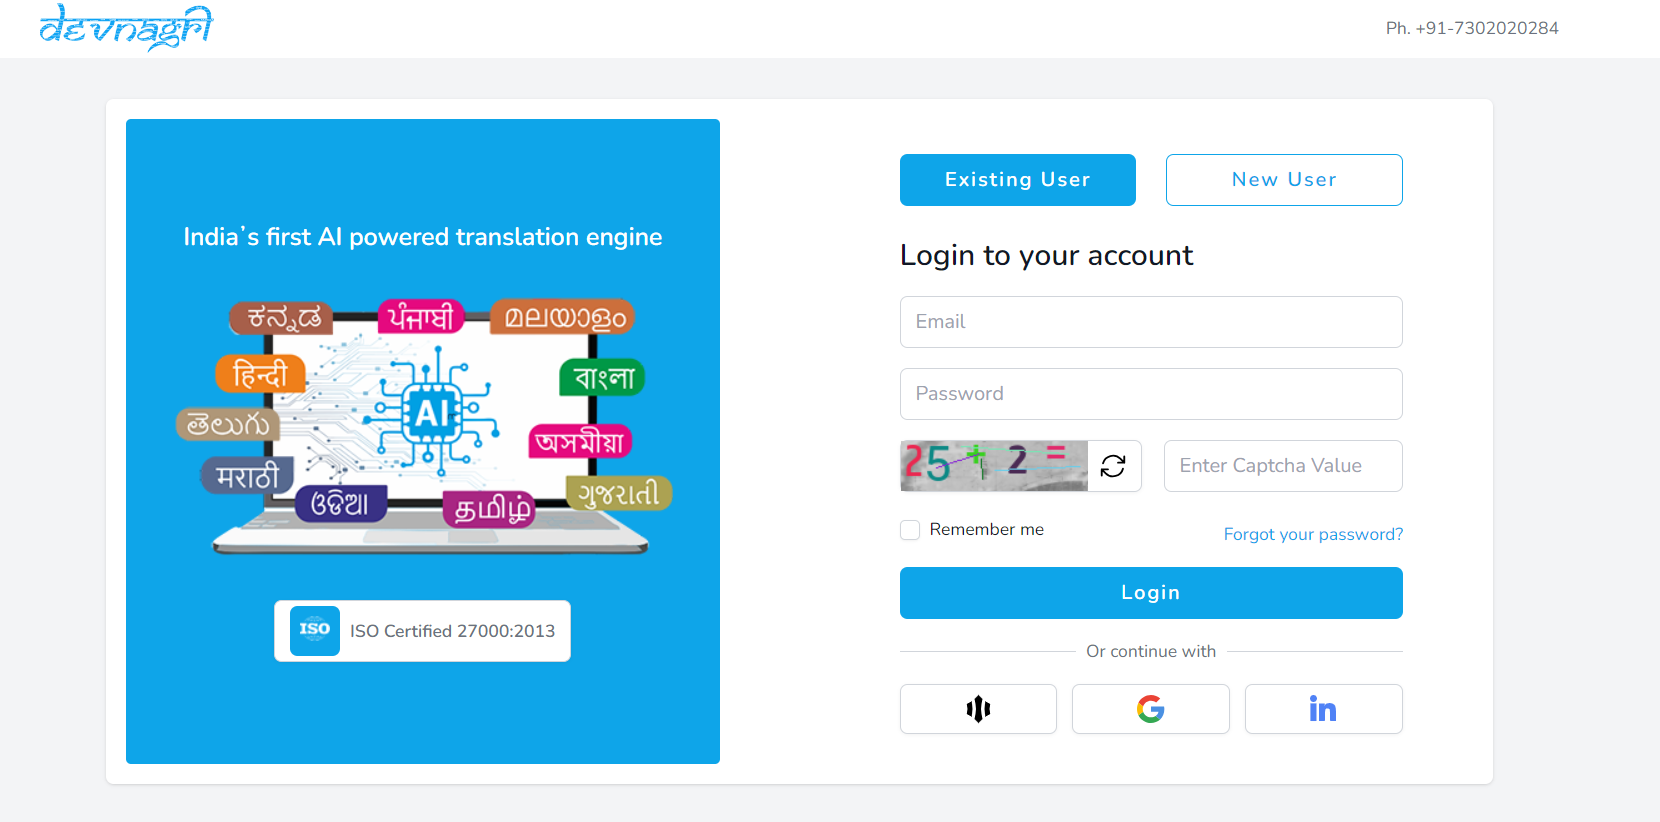
- User can also login using “Magic Link” option, the user needs to enter the registered email address in the text box and an autologin link will be sent on the registered email address.
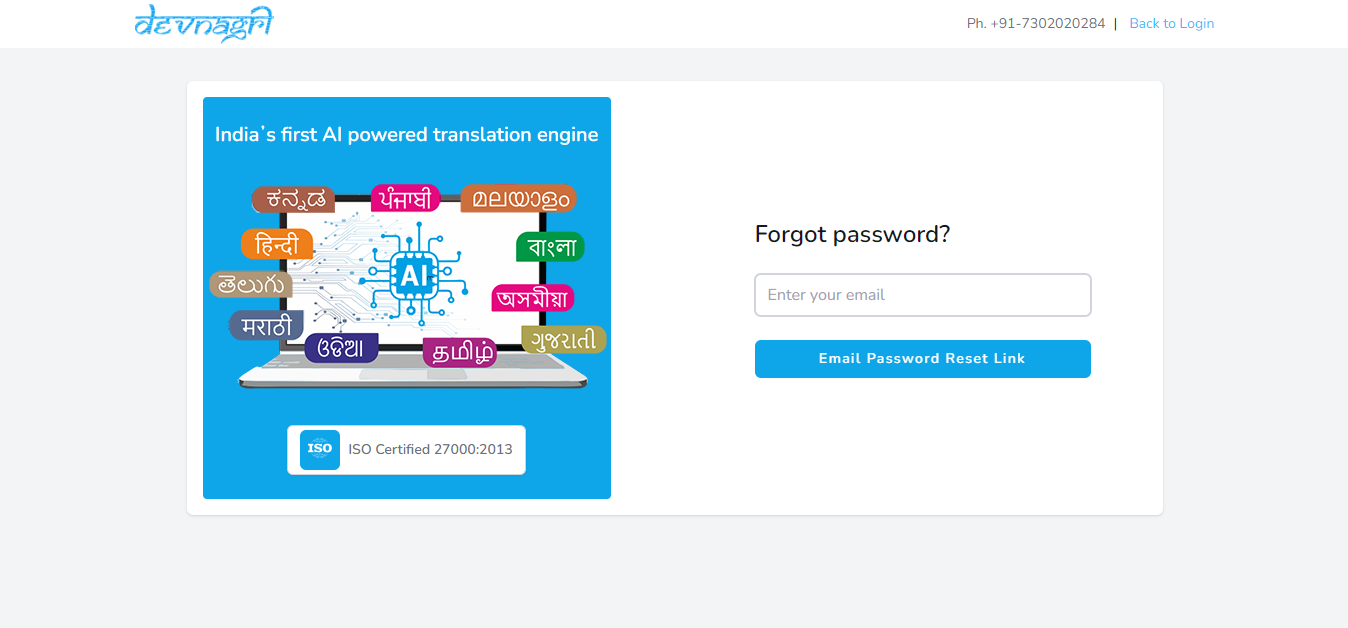
# Password Recovery
If a user has forgotten (or wants to reset) the password, then using “Forgot Password” (opens new window) option given on login screen it can be reset. Enter the registered Email ID, a reset password link will be sent over email. Click on that link and enter new password. User will be notified on the successful update of the password.
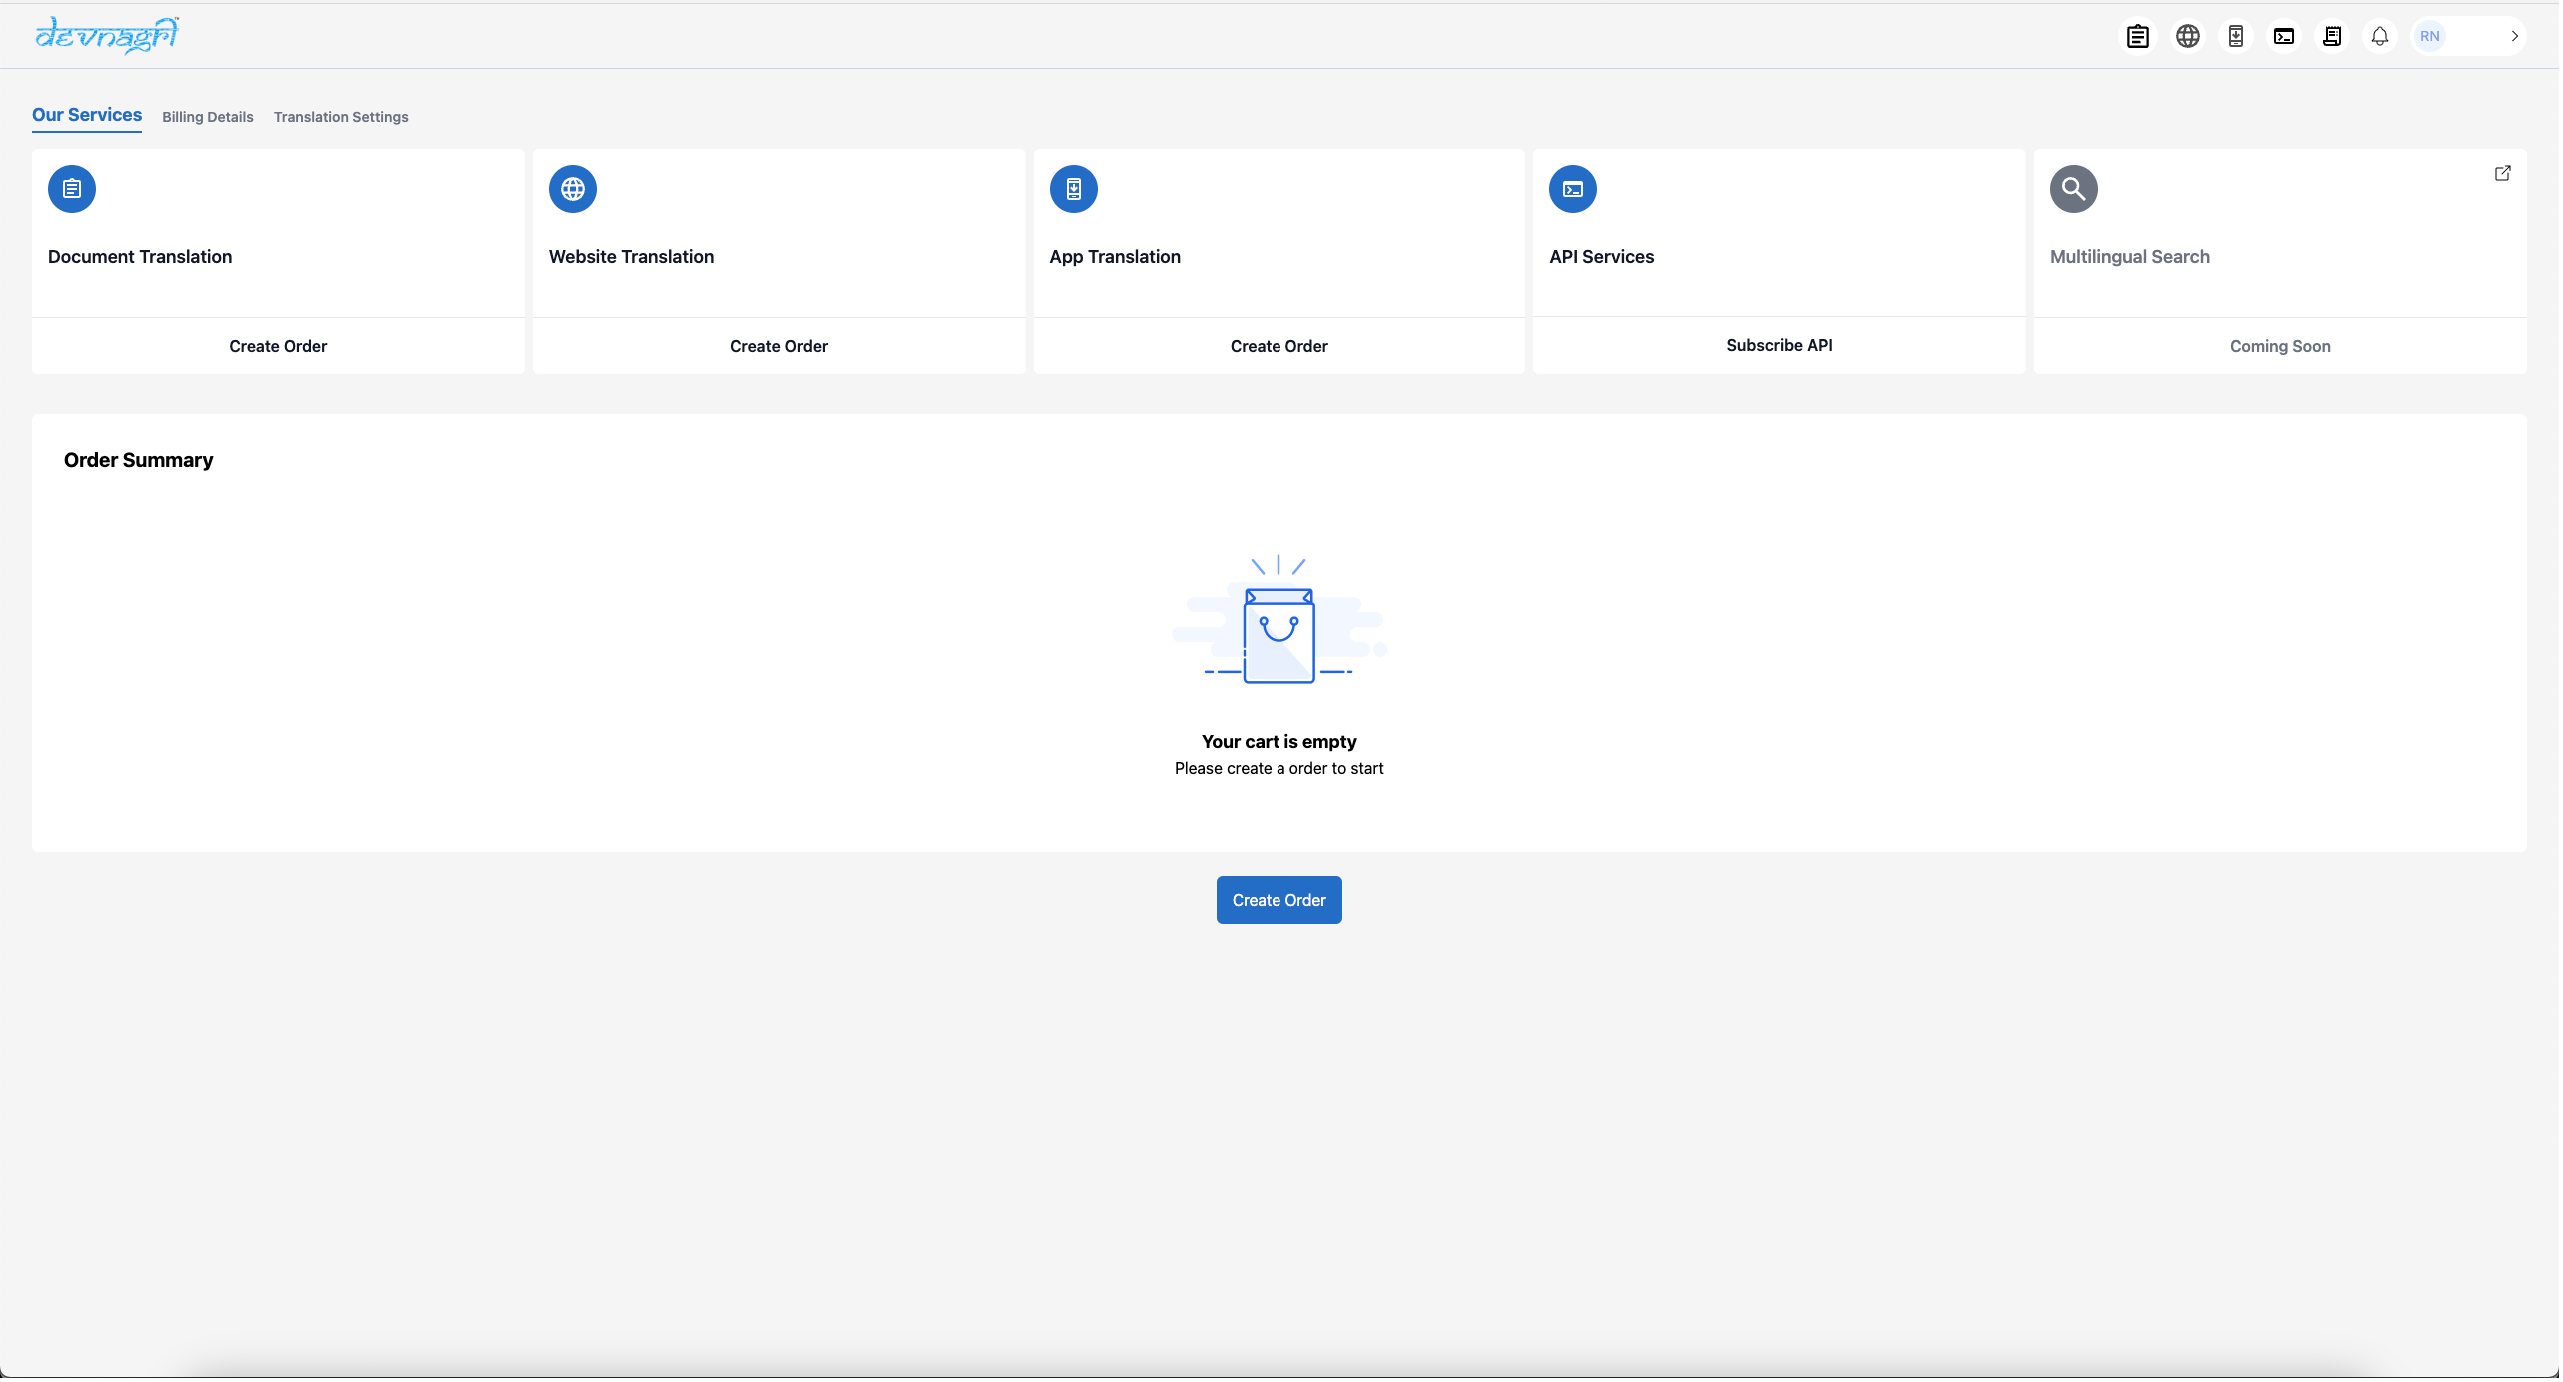
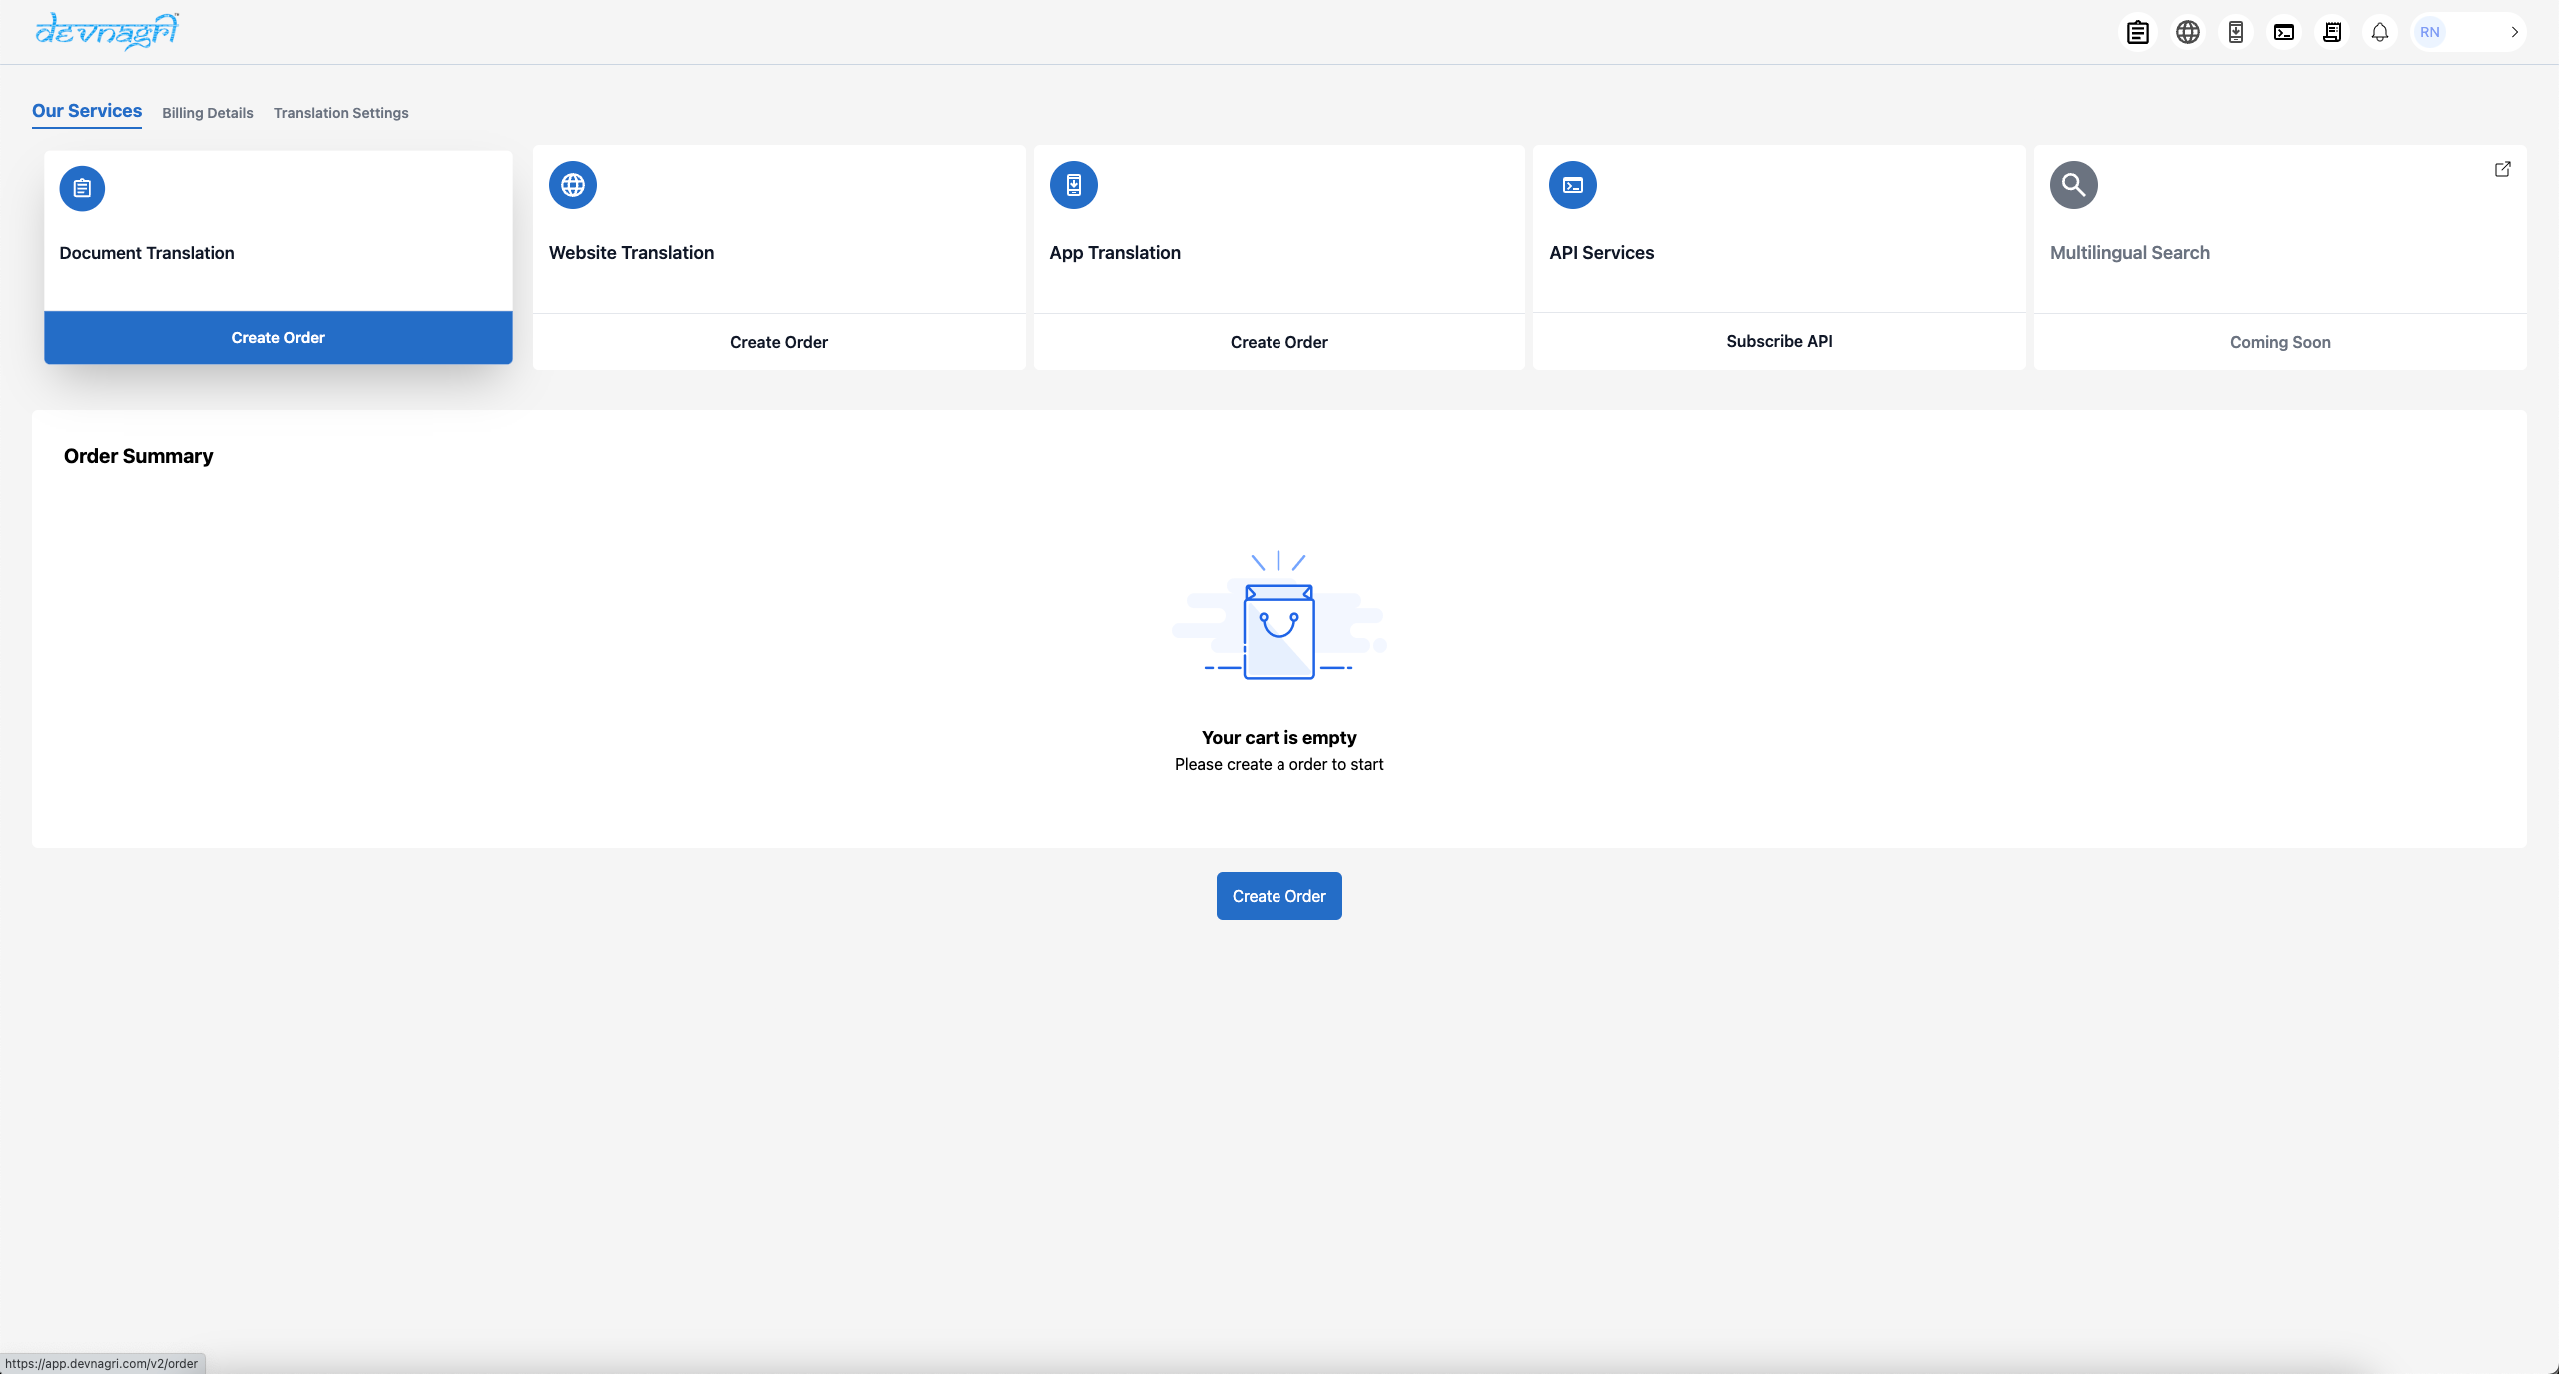
# Create Document Translation Order
To create a Document Translation order, one needs to click on the Create Order Button on the Document Order tile.
Once Billing details are updated, user can proceed to create an order.
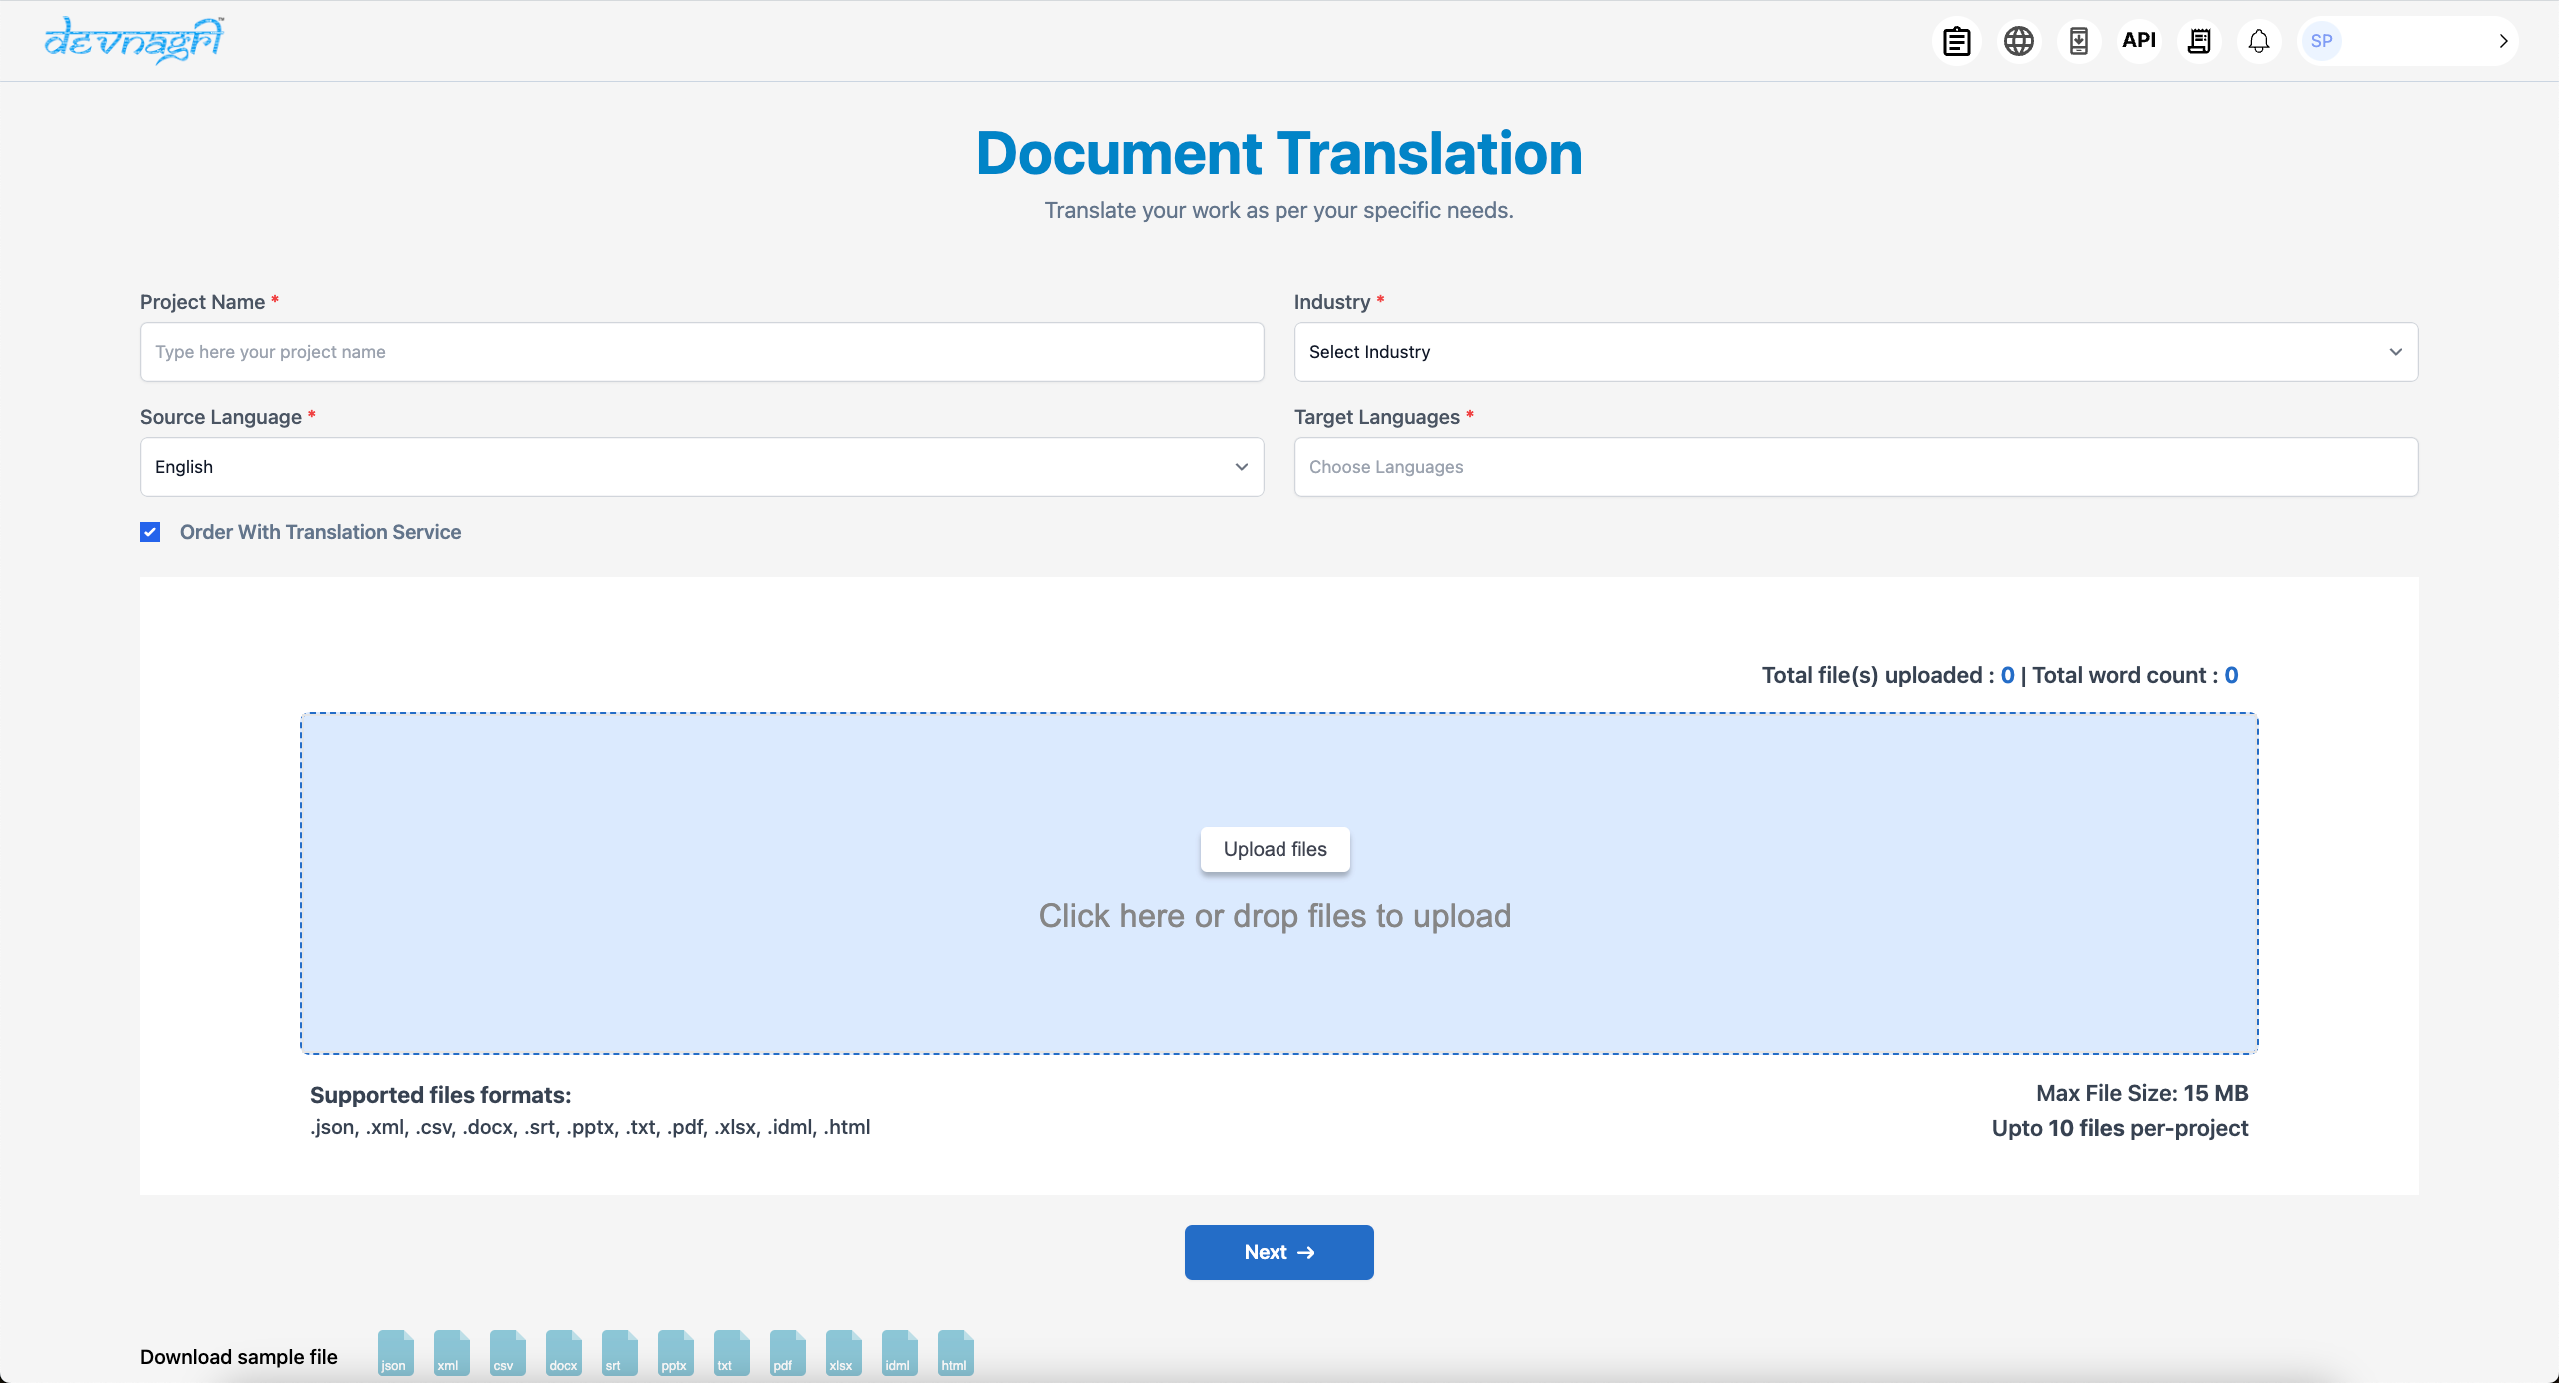
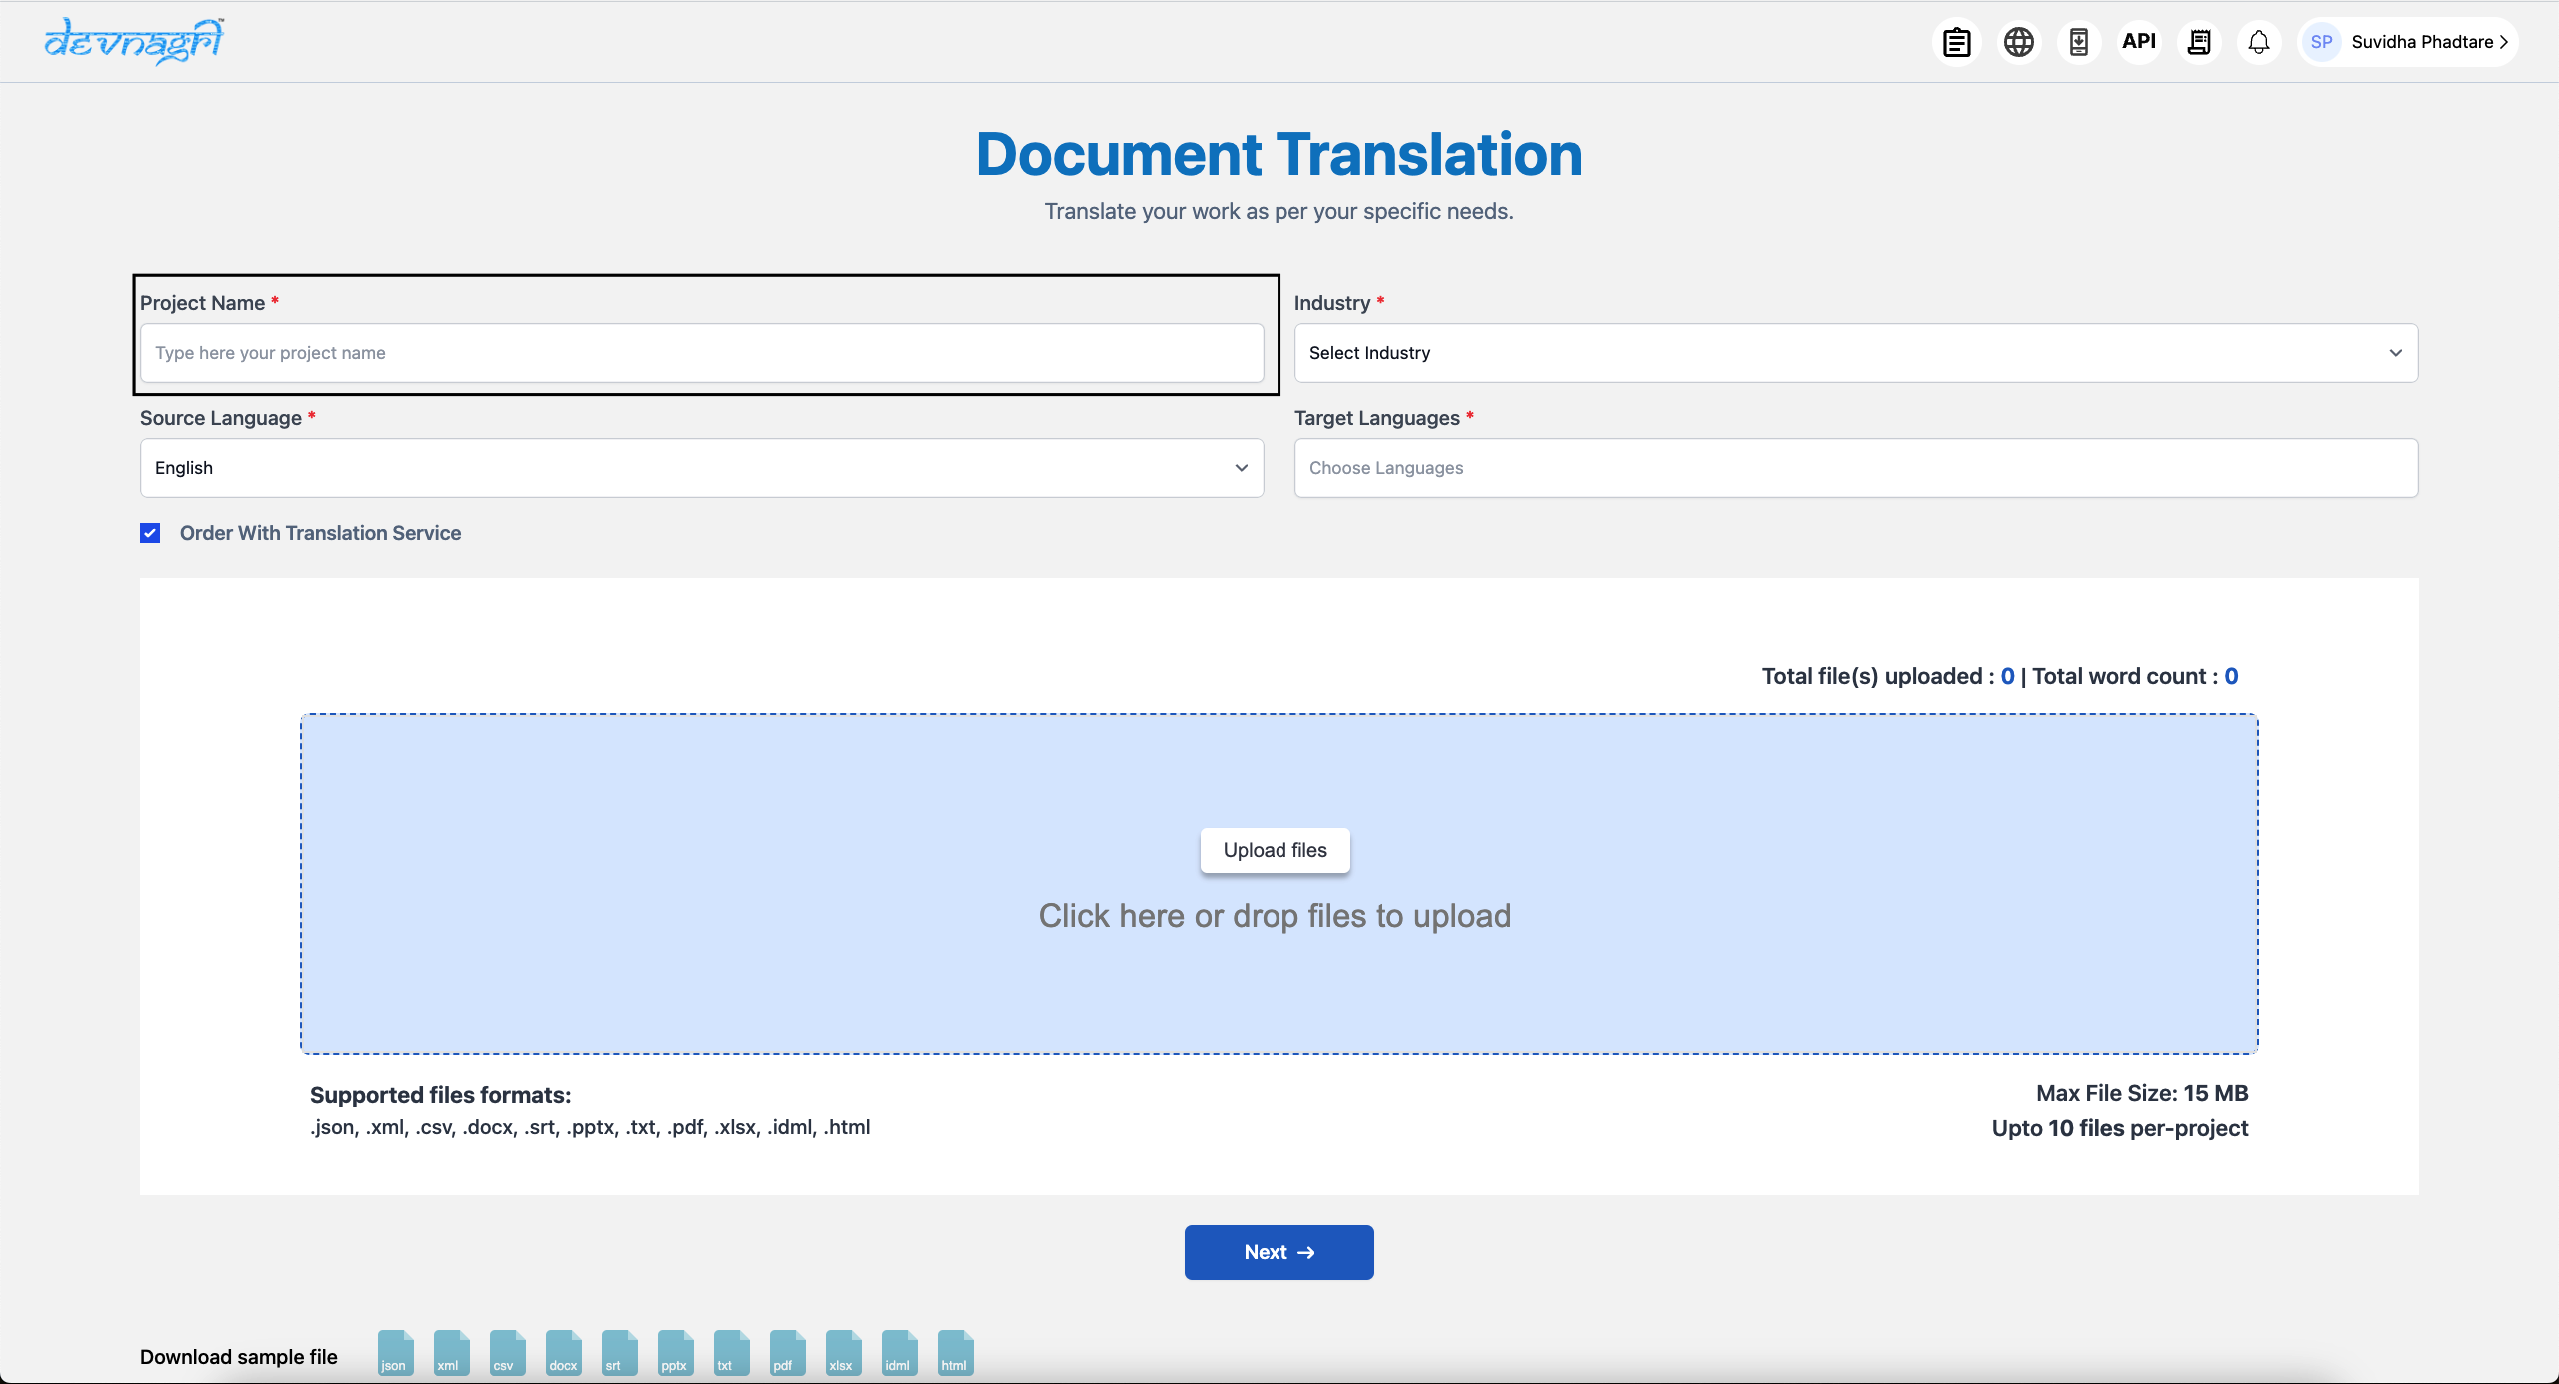
# Enter Project Name
Choose a relevant project name for the document translation order. This can relate to company, date, or any other name which the user could remember in future.
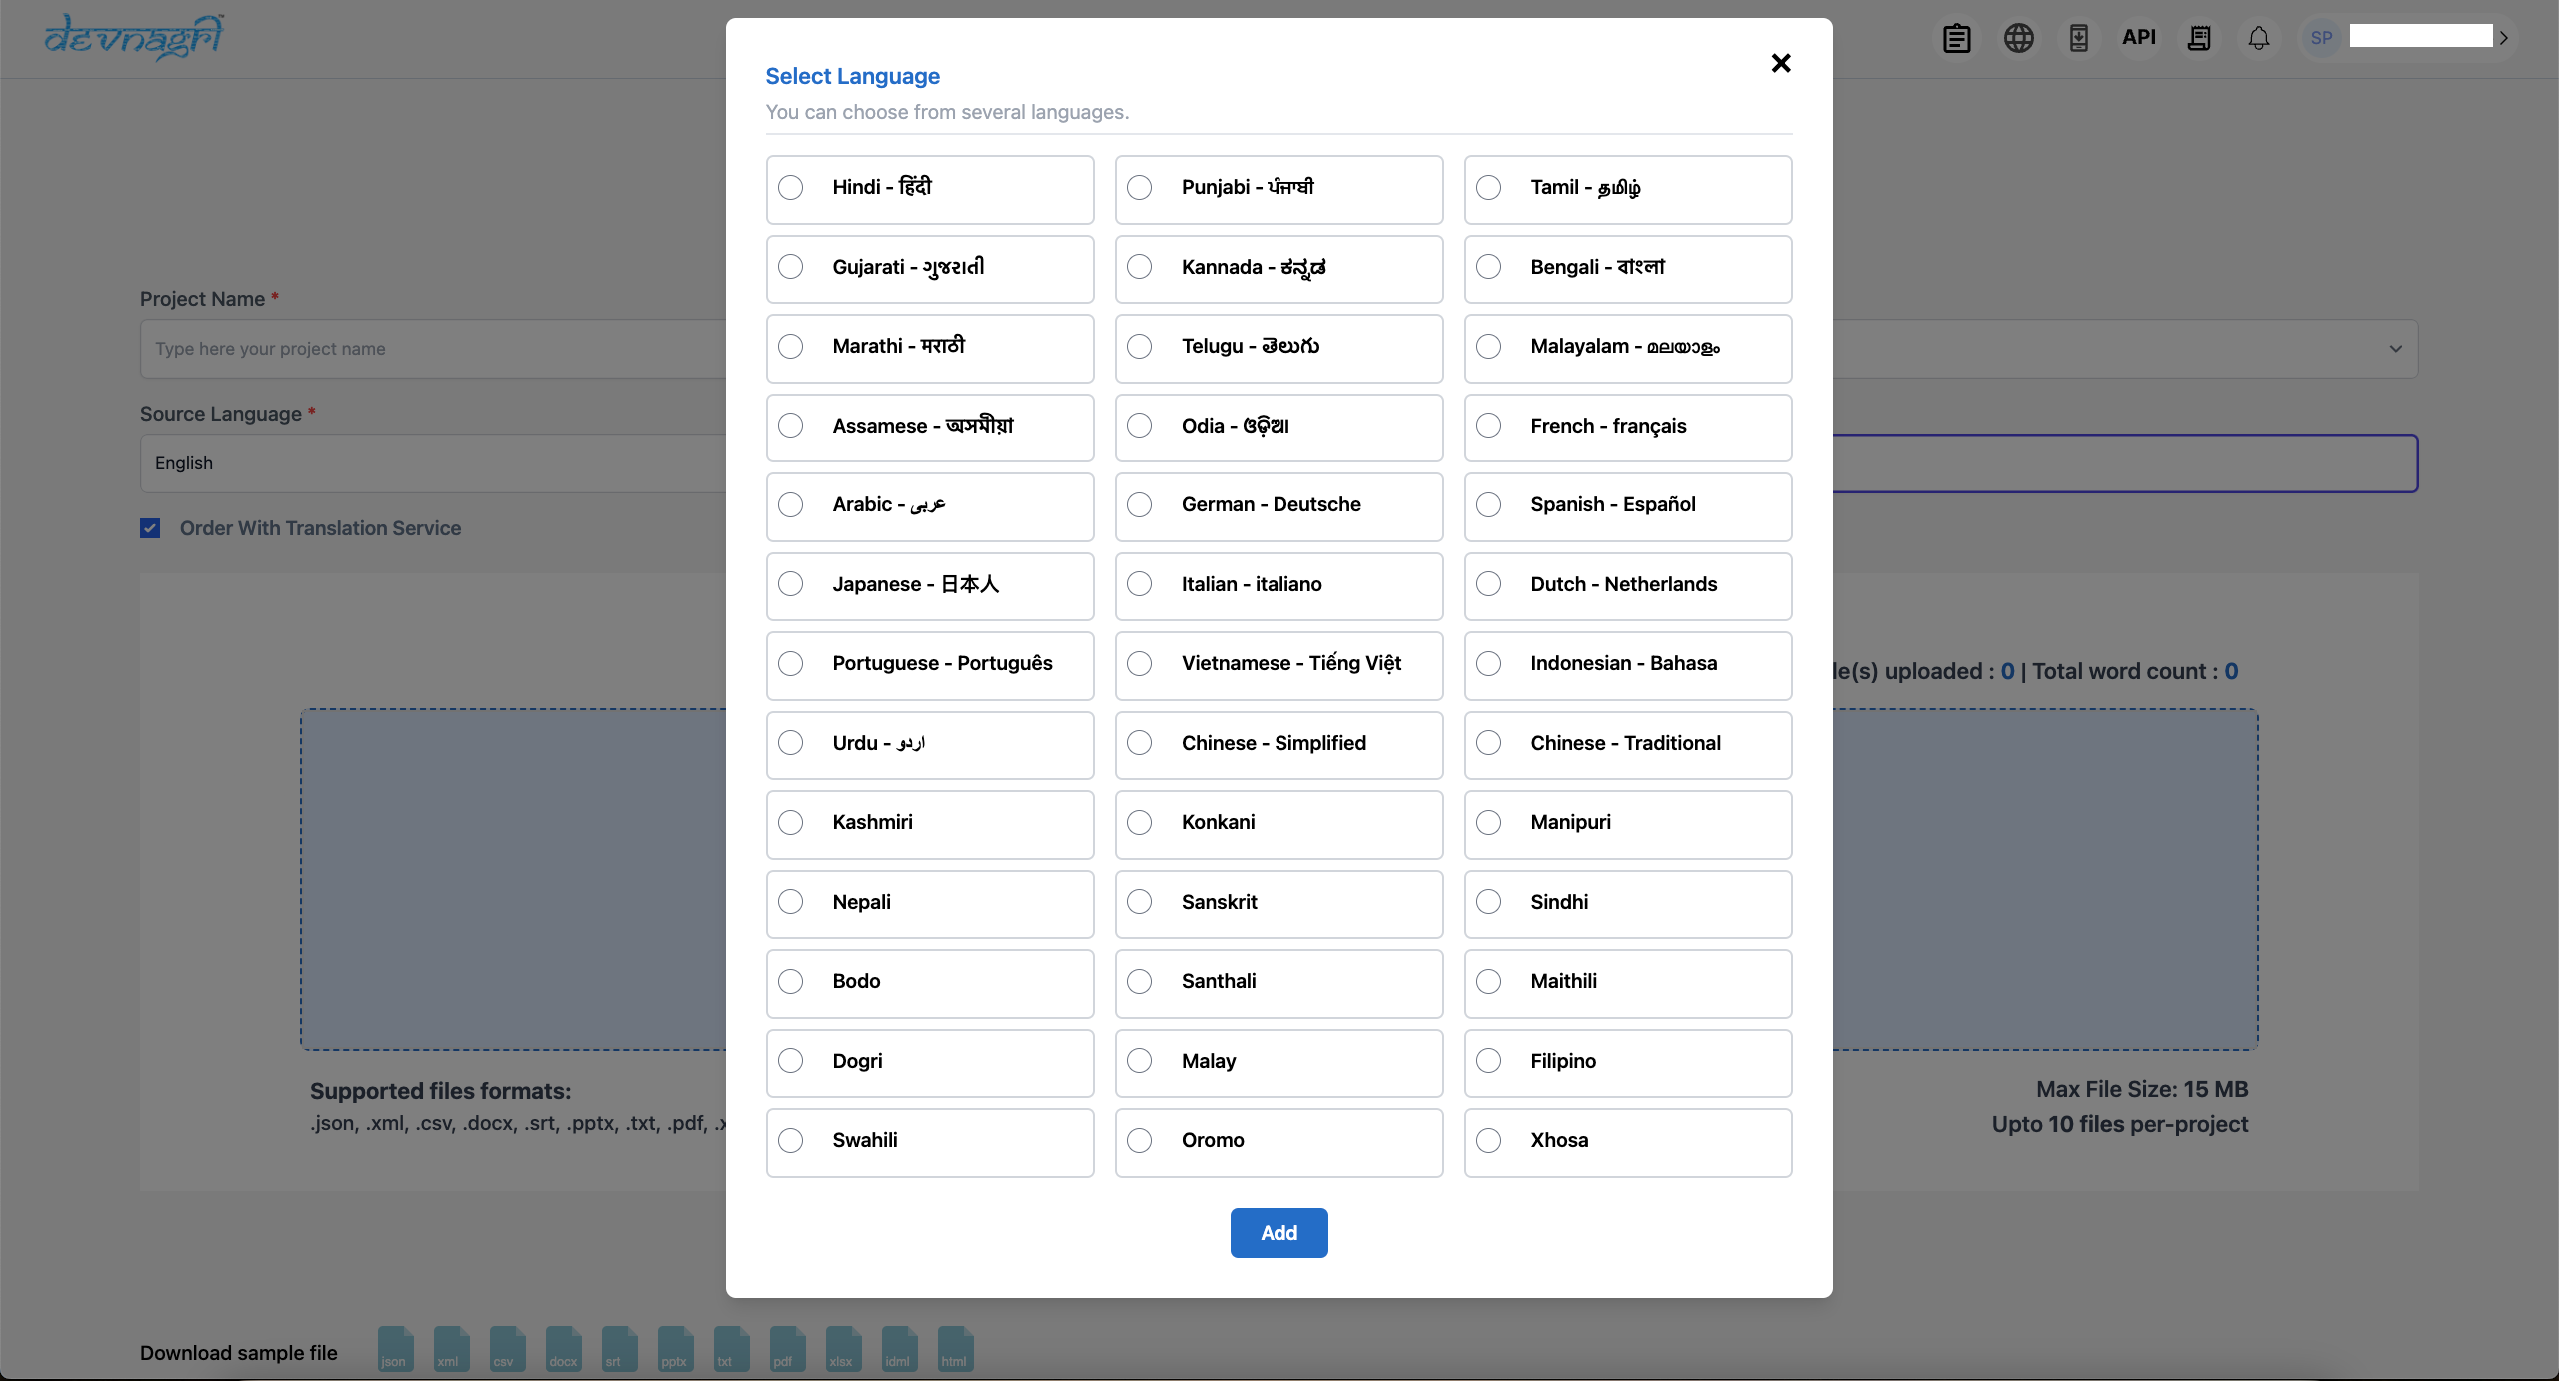
# Select Target Languages
There will be a list of languages available for translation. User can select more than one language and can get translation in multiple languages in a single order. User will be given the choice where Source Language will be English and target language can be multiple.
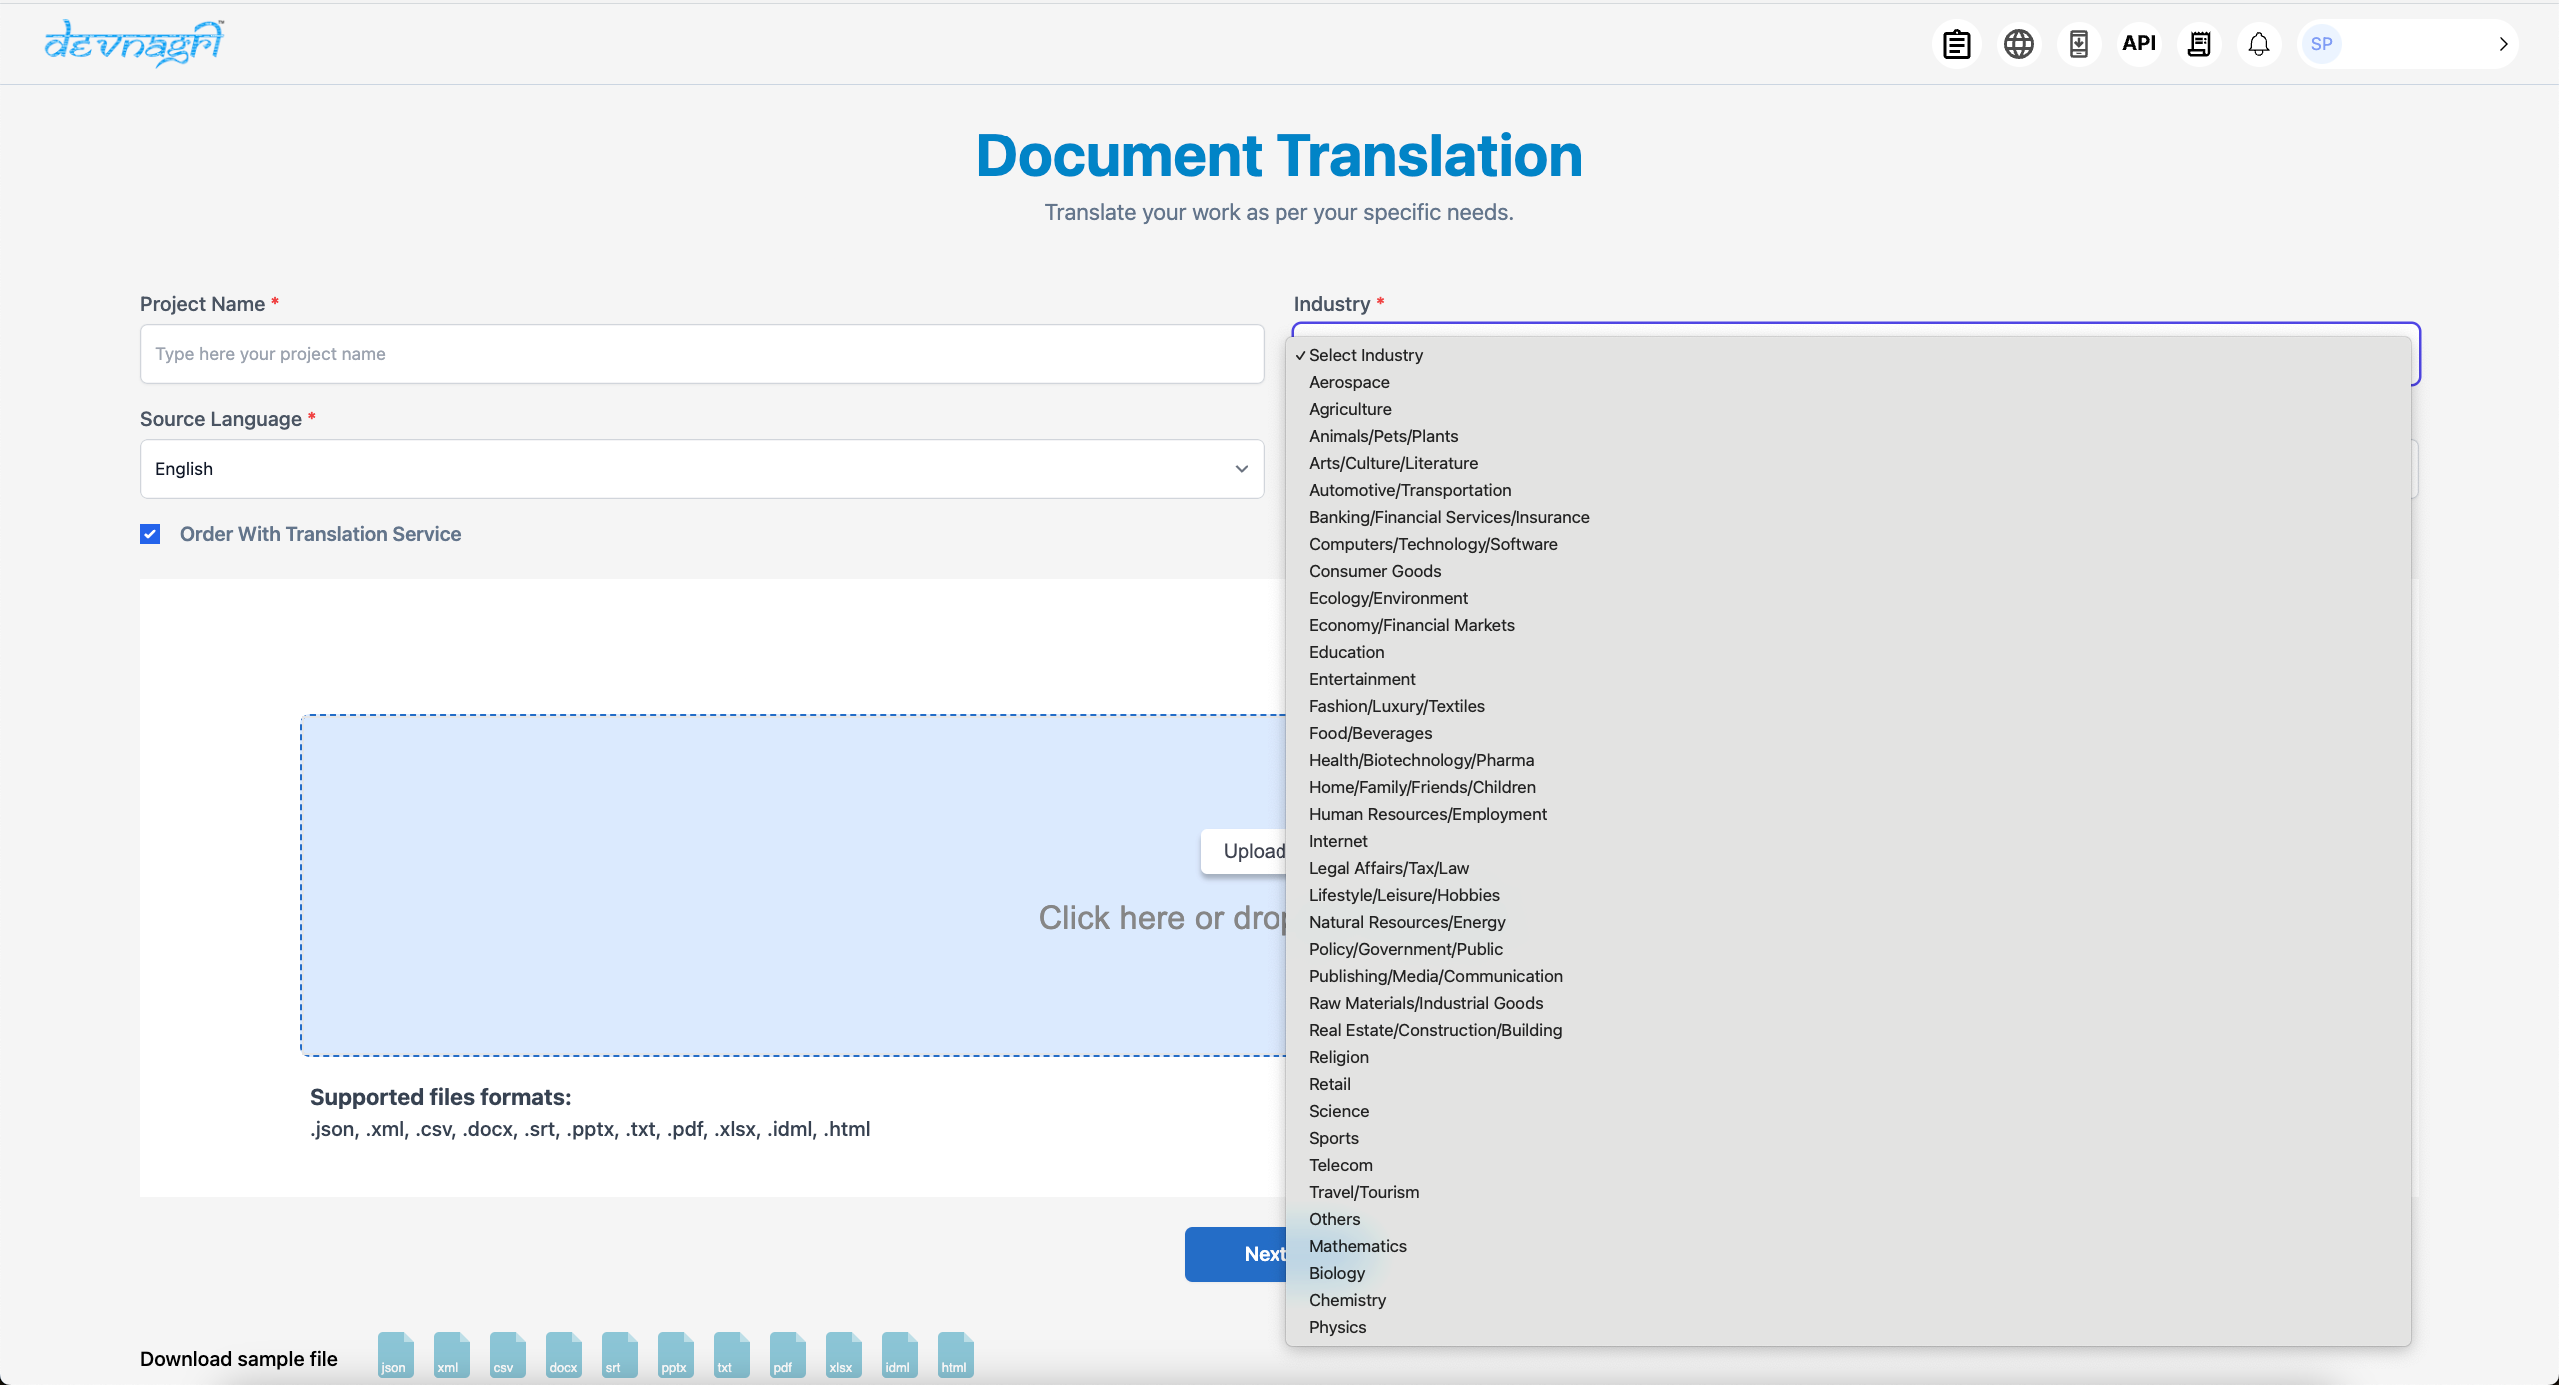
# Select Industry
User needs to select the industry to which the content is related. It helps Devnagri AI to assist better in the translation process. Also industry wise glossary feature is available in Devnagri which depends on this selection.
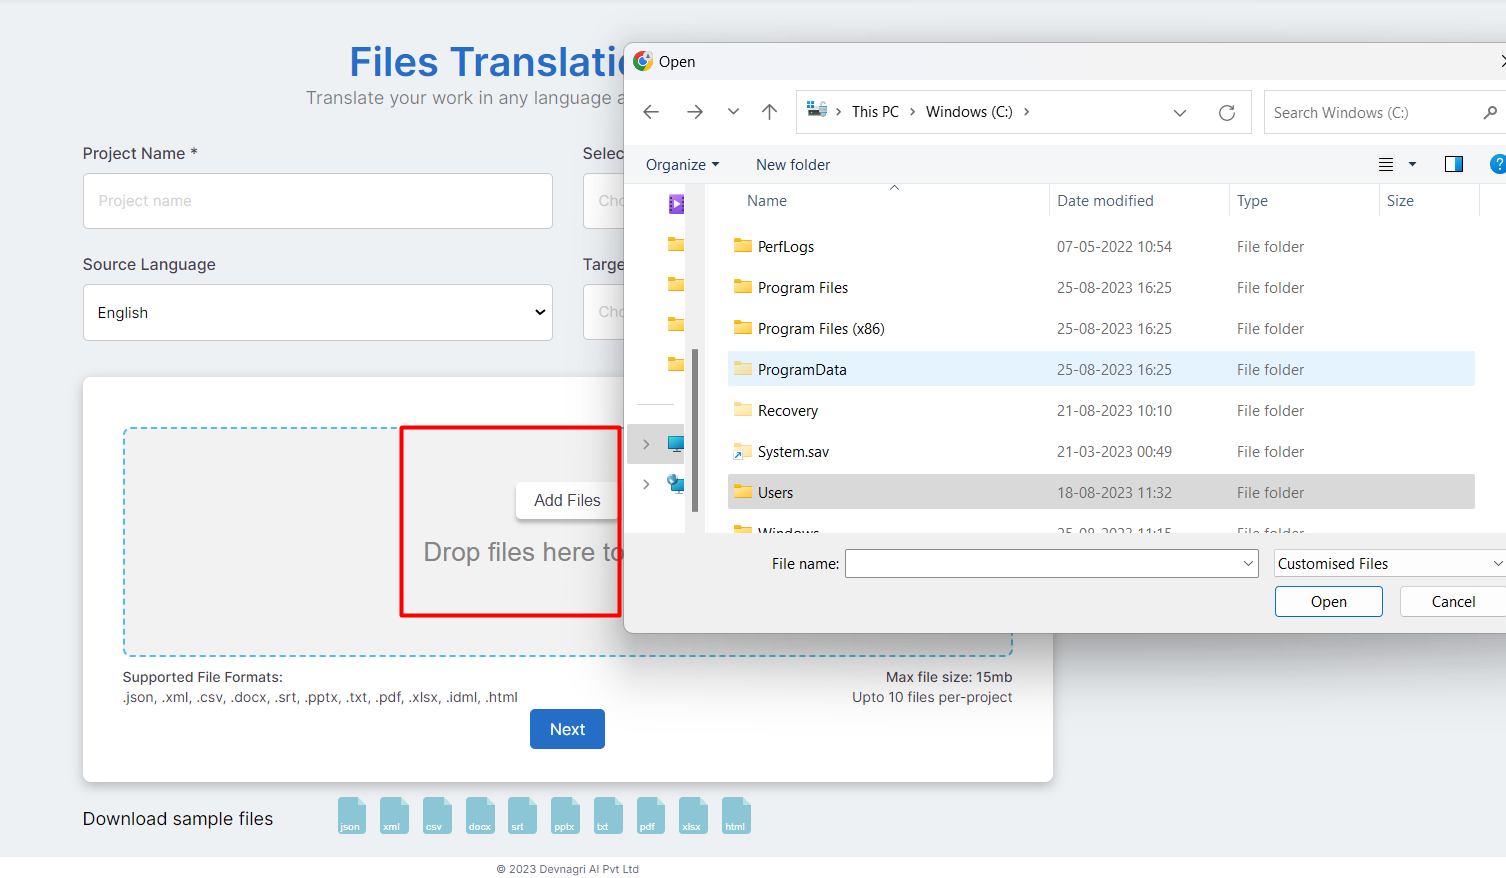
# Upload Files To Translate
User has the choice to either select or drop files. Multiple files (Upto 10 files with maximum file size of 15MB each) can be uploaded in different formats. We accept 11 different file formats (.json, .xml, .csv, .docx, .srt, .pptx, .txt, .pdf, .xlsx, .idml, .html).
# After the upload process is finished, you can click the "Next" button to provide additional details on the following screen.

# Service Type
Choose the translation service pricing package according to the requirement. There are different packages according to the service provided.
# Standard Translation Service - User will get certified translators from the chosen industry. The accuracy rate will be around 70-80%.
# Premium Translation Service - User will get certified translators and reviewers from the chosen industry. The accuracy rate will be upwards of 95%.

# Tone of Translation
Choose the translation tone that best suits your target audience and aligns with the company communication strategy.
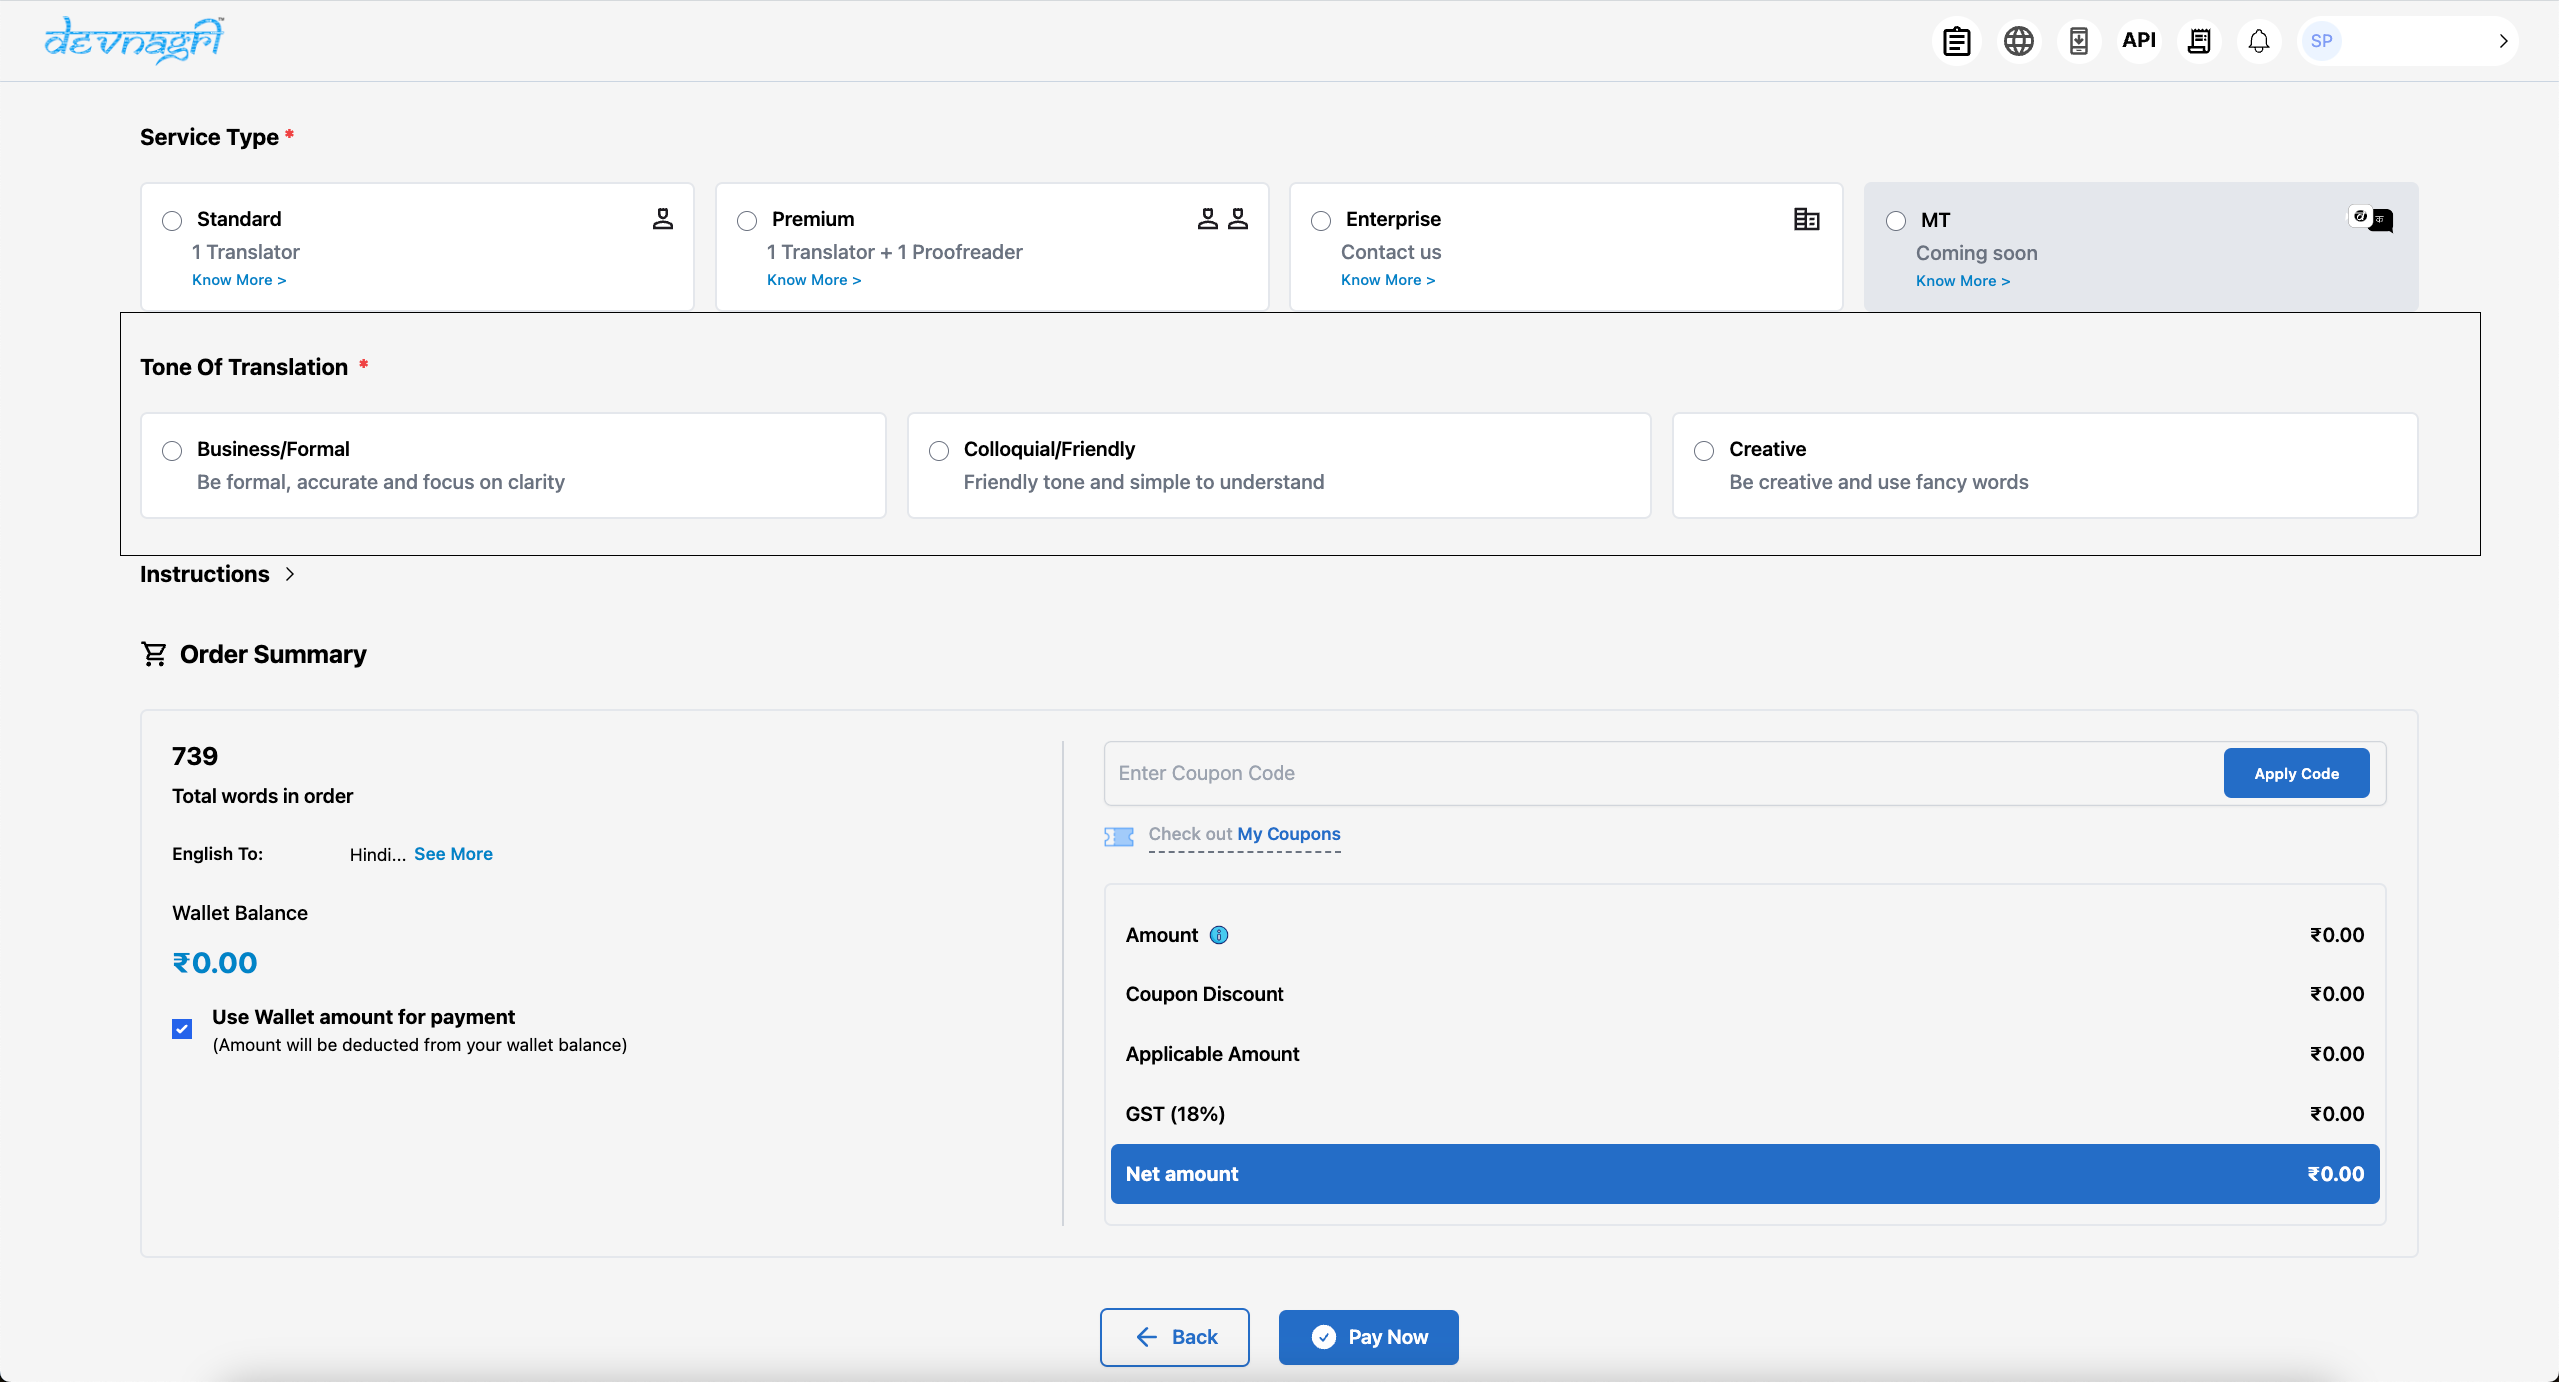
# Instruction
This section contains additional information about the order. Users should include all specific instructions and details here.
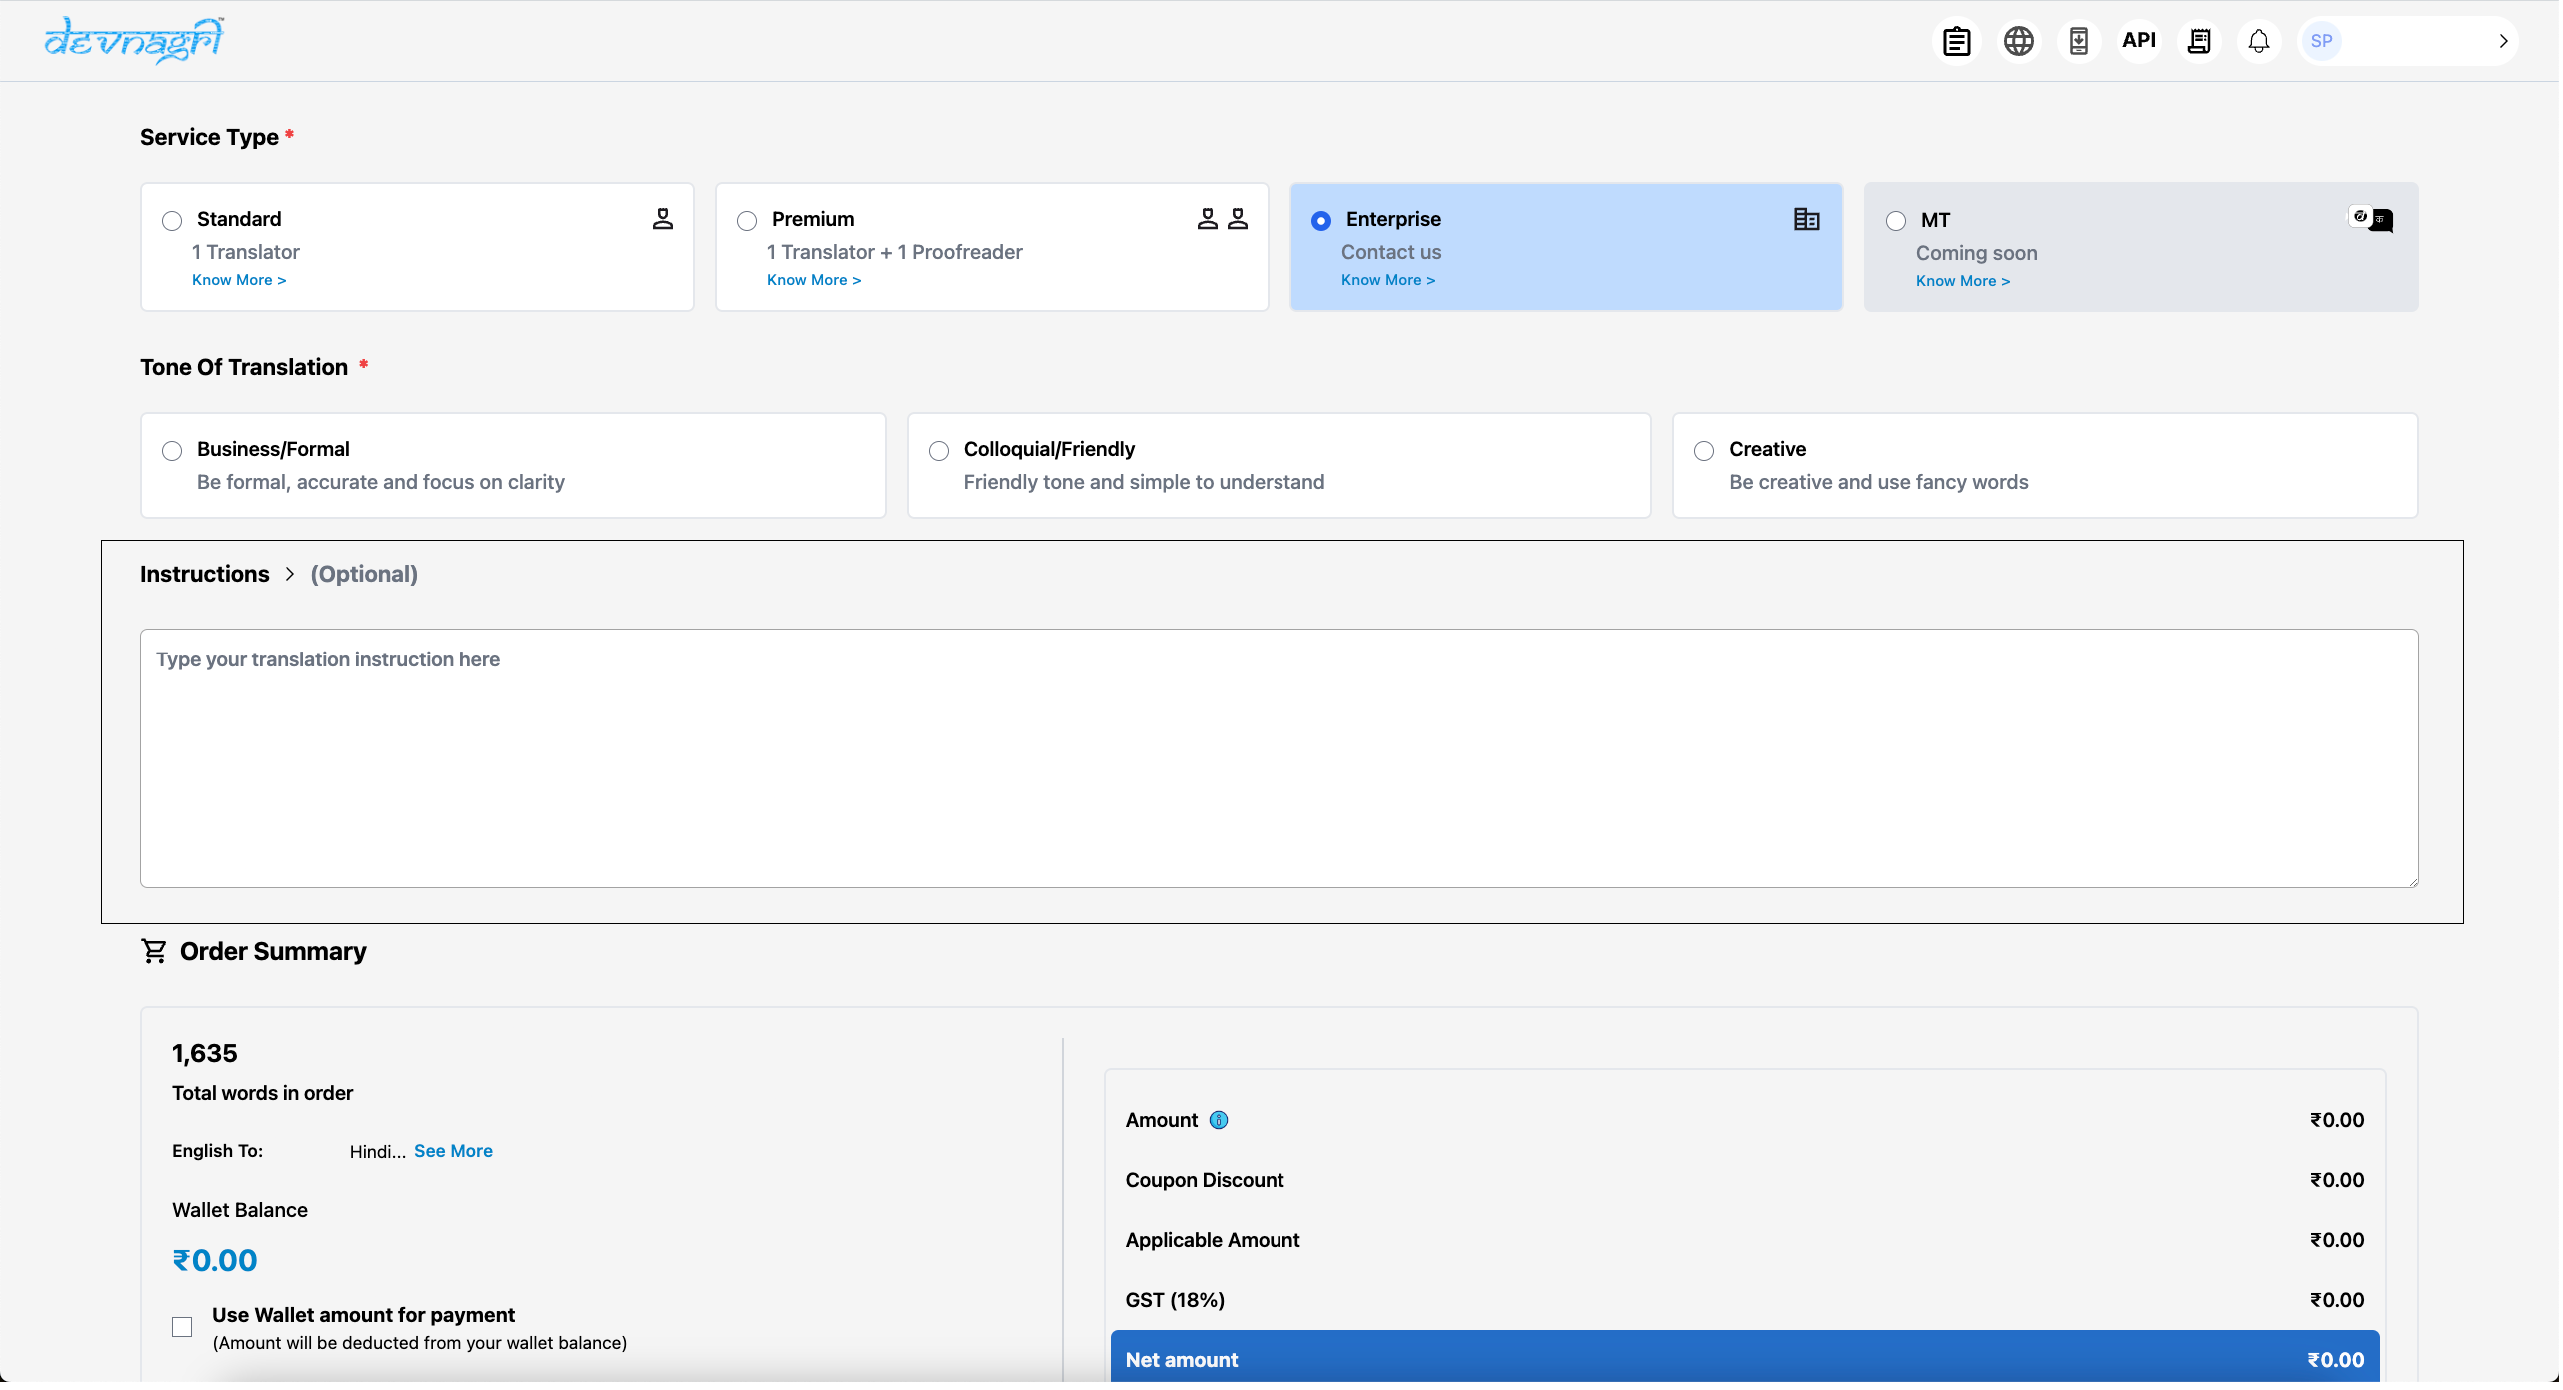
# Order Summary
At the bottom of the order page, you will find the Order Summary. This section displays details such as word count, language, and total payable amount.
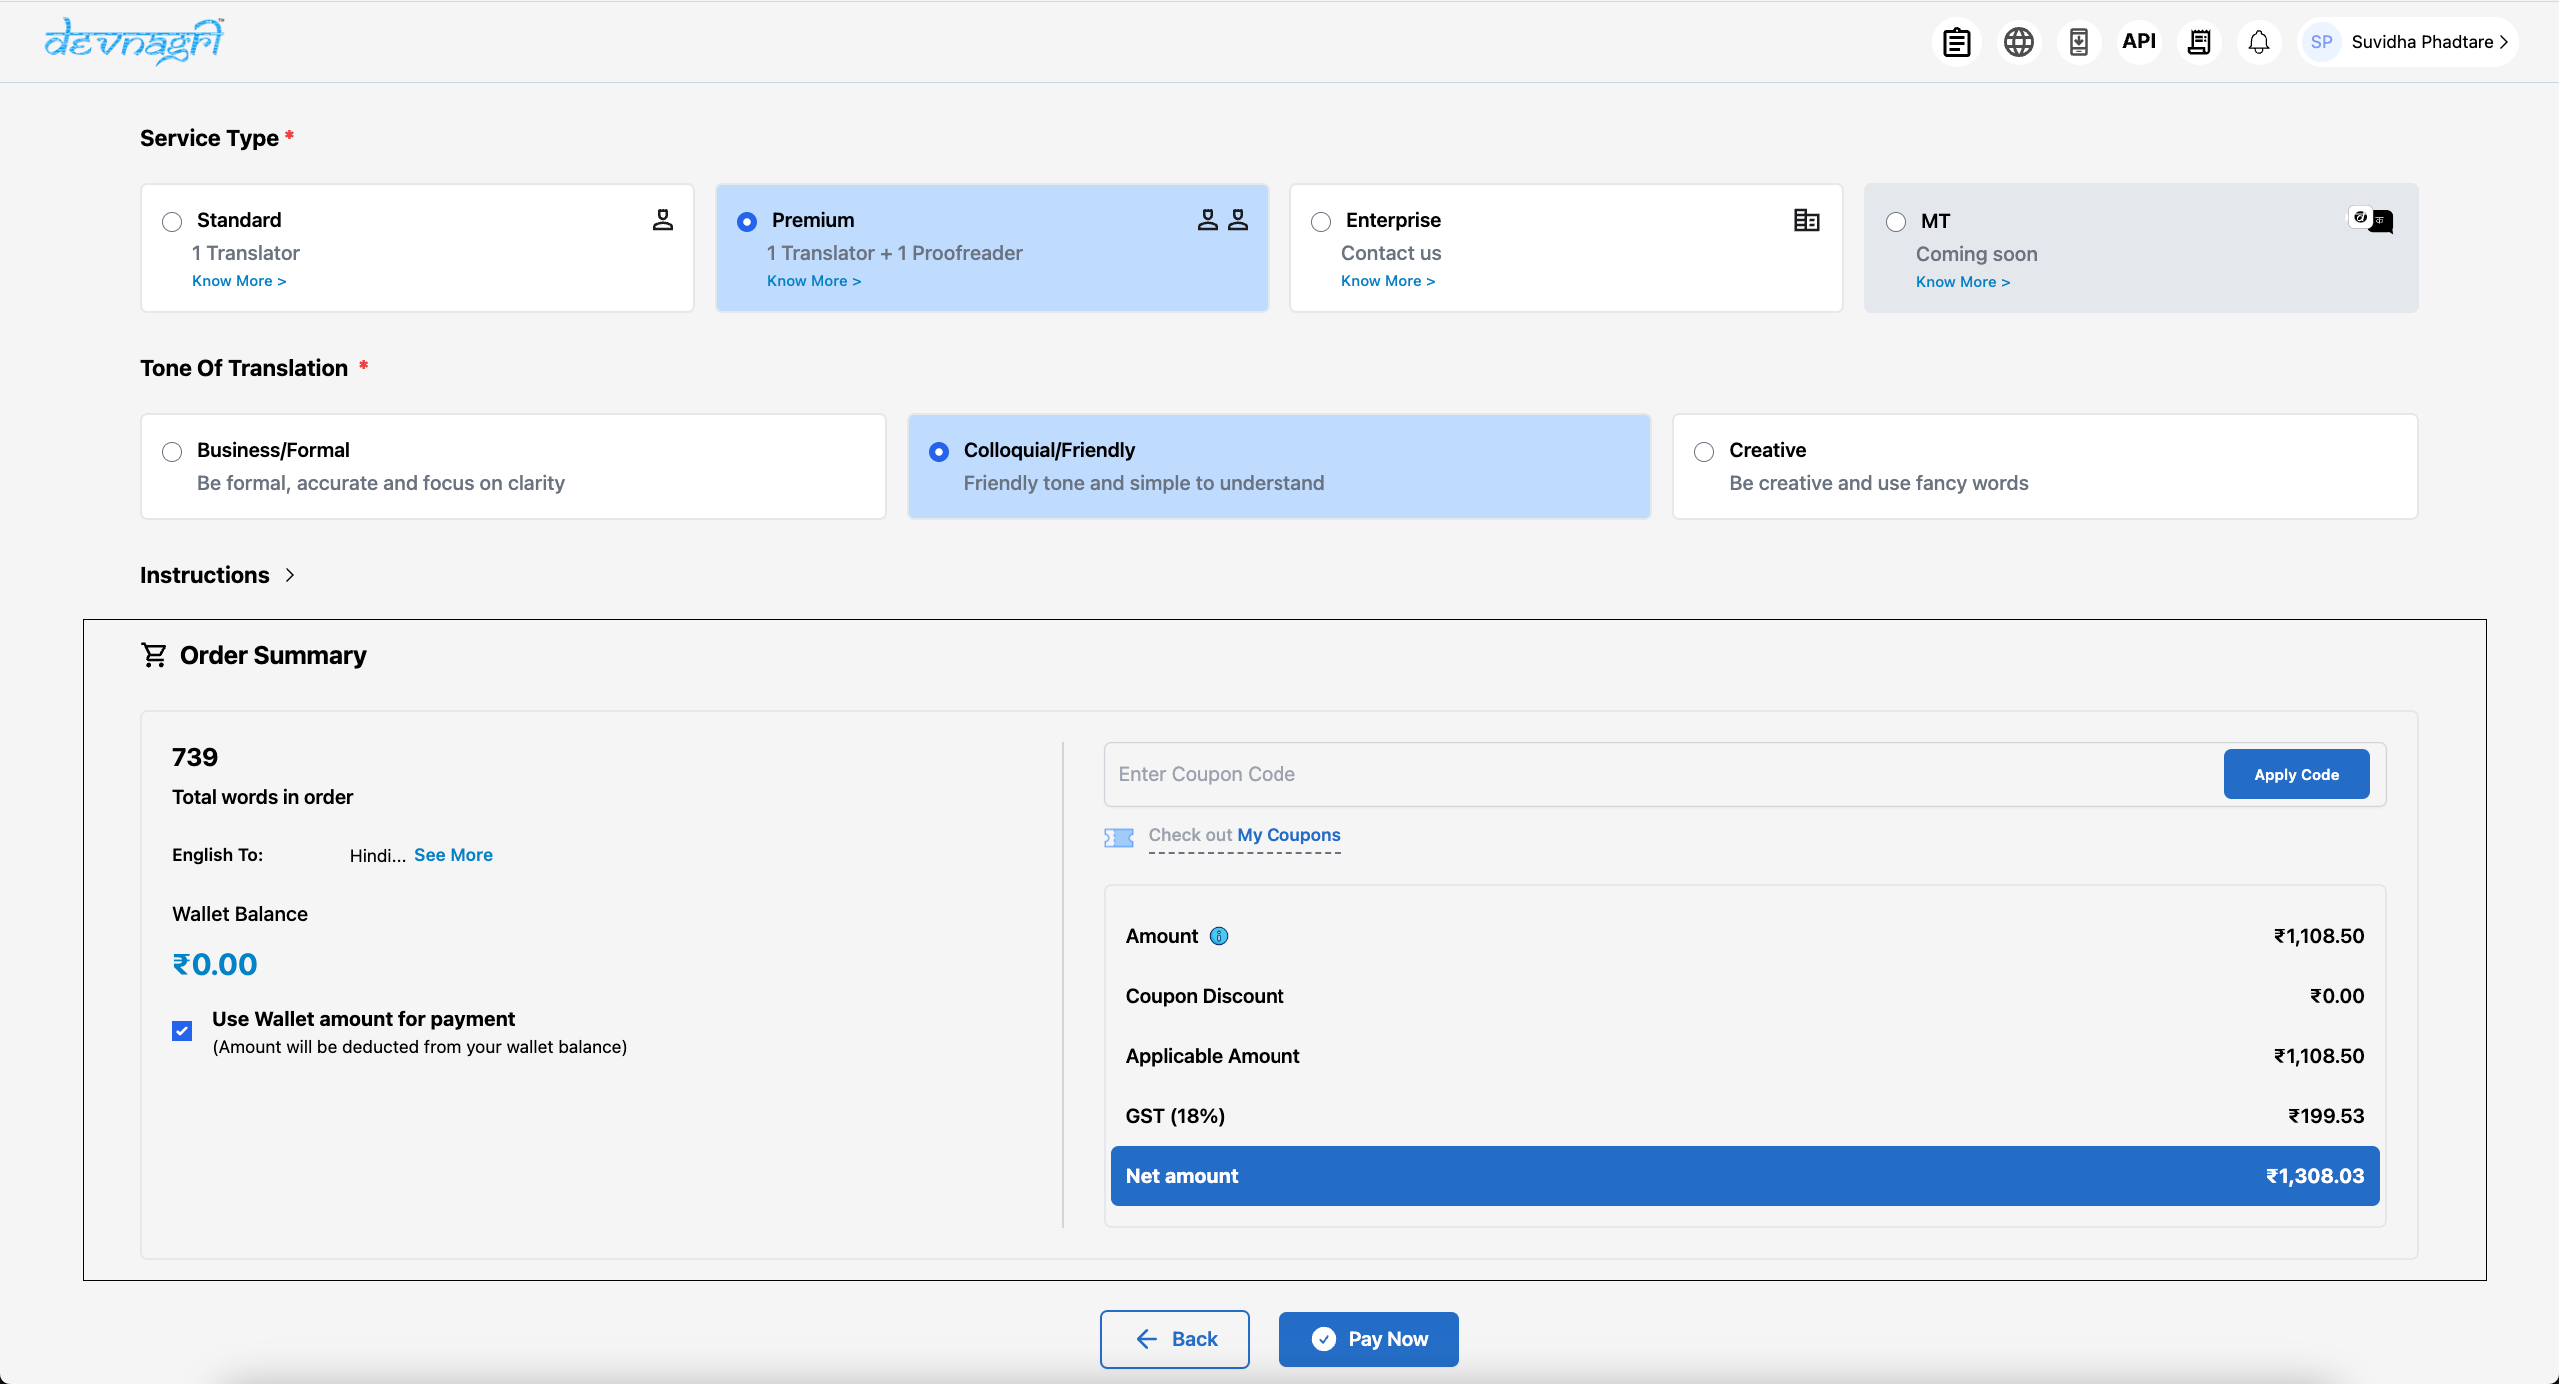
# Total Words
The total number of words will be shown after calculation from the uploaded files.
# Amount
The total order amount including taxes.
# Wallet Balance
It shows available wallet balance in user account.
# English To
This section displays the list of target languages chosen for translation. Users can verify whether all the desired languages have been selected.
# Apply Coupon
Users can apply any available offer coupons here, which will provide a discount on the billing amount basis the code.
# Total Amount
The actual billable amount after applying any coupon is shown for final billing. User can select the option to “Pay Now” and can make the payment with internal credits or online through the payment gateway.
# Payment
User will be redirected to the payment gateway upon clicking on Pay Now, where the amount for the order can be paid using various methods such as Scan QR with Paytm, netbanking, debit card, credit card etc.

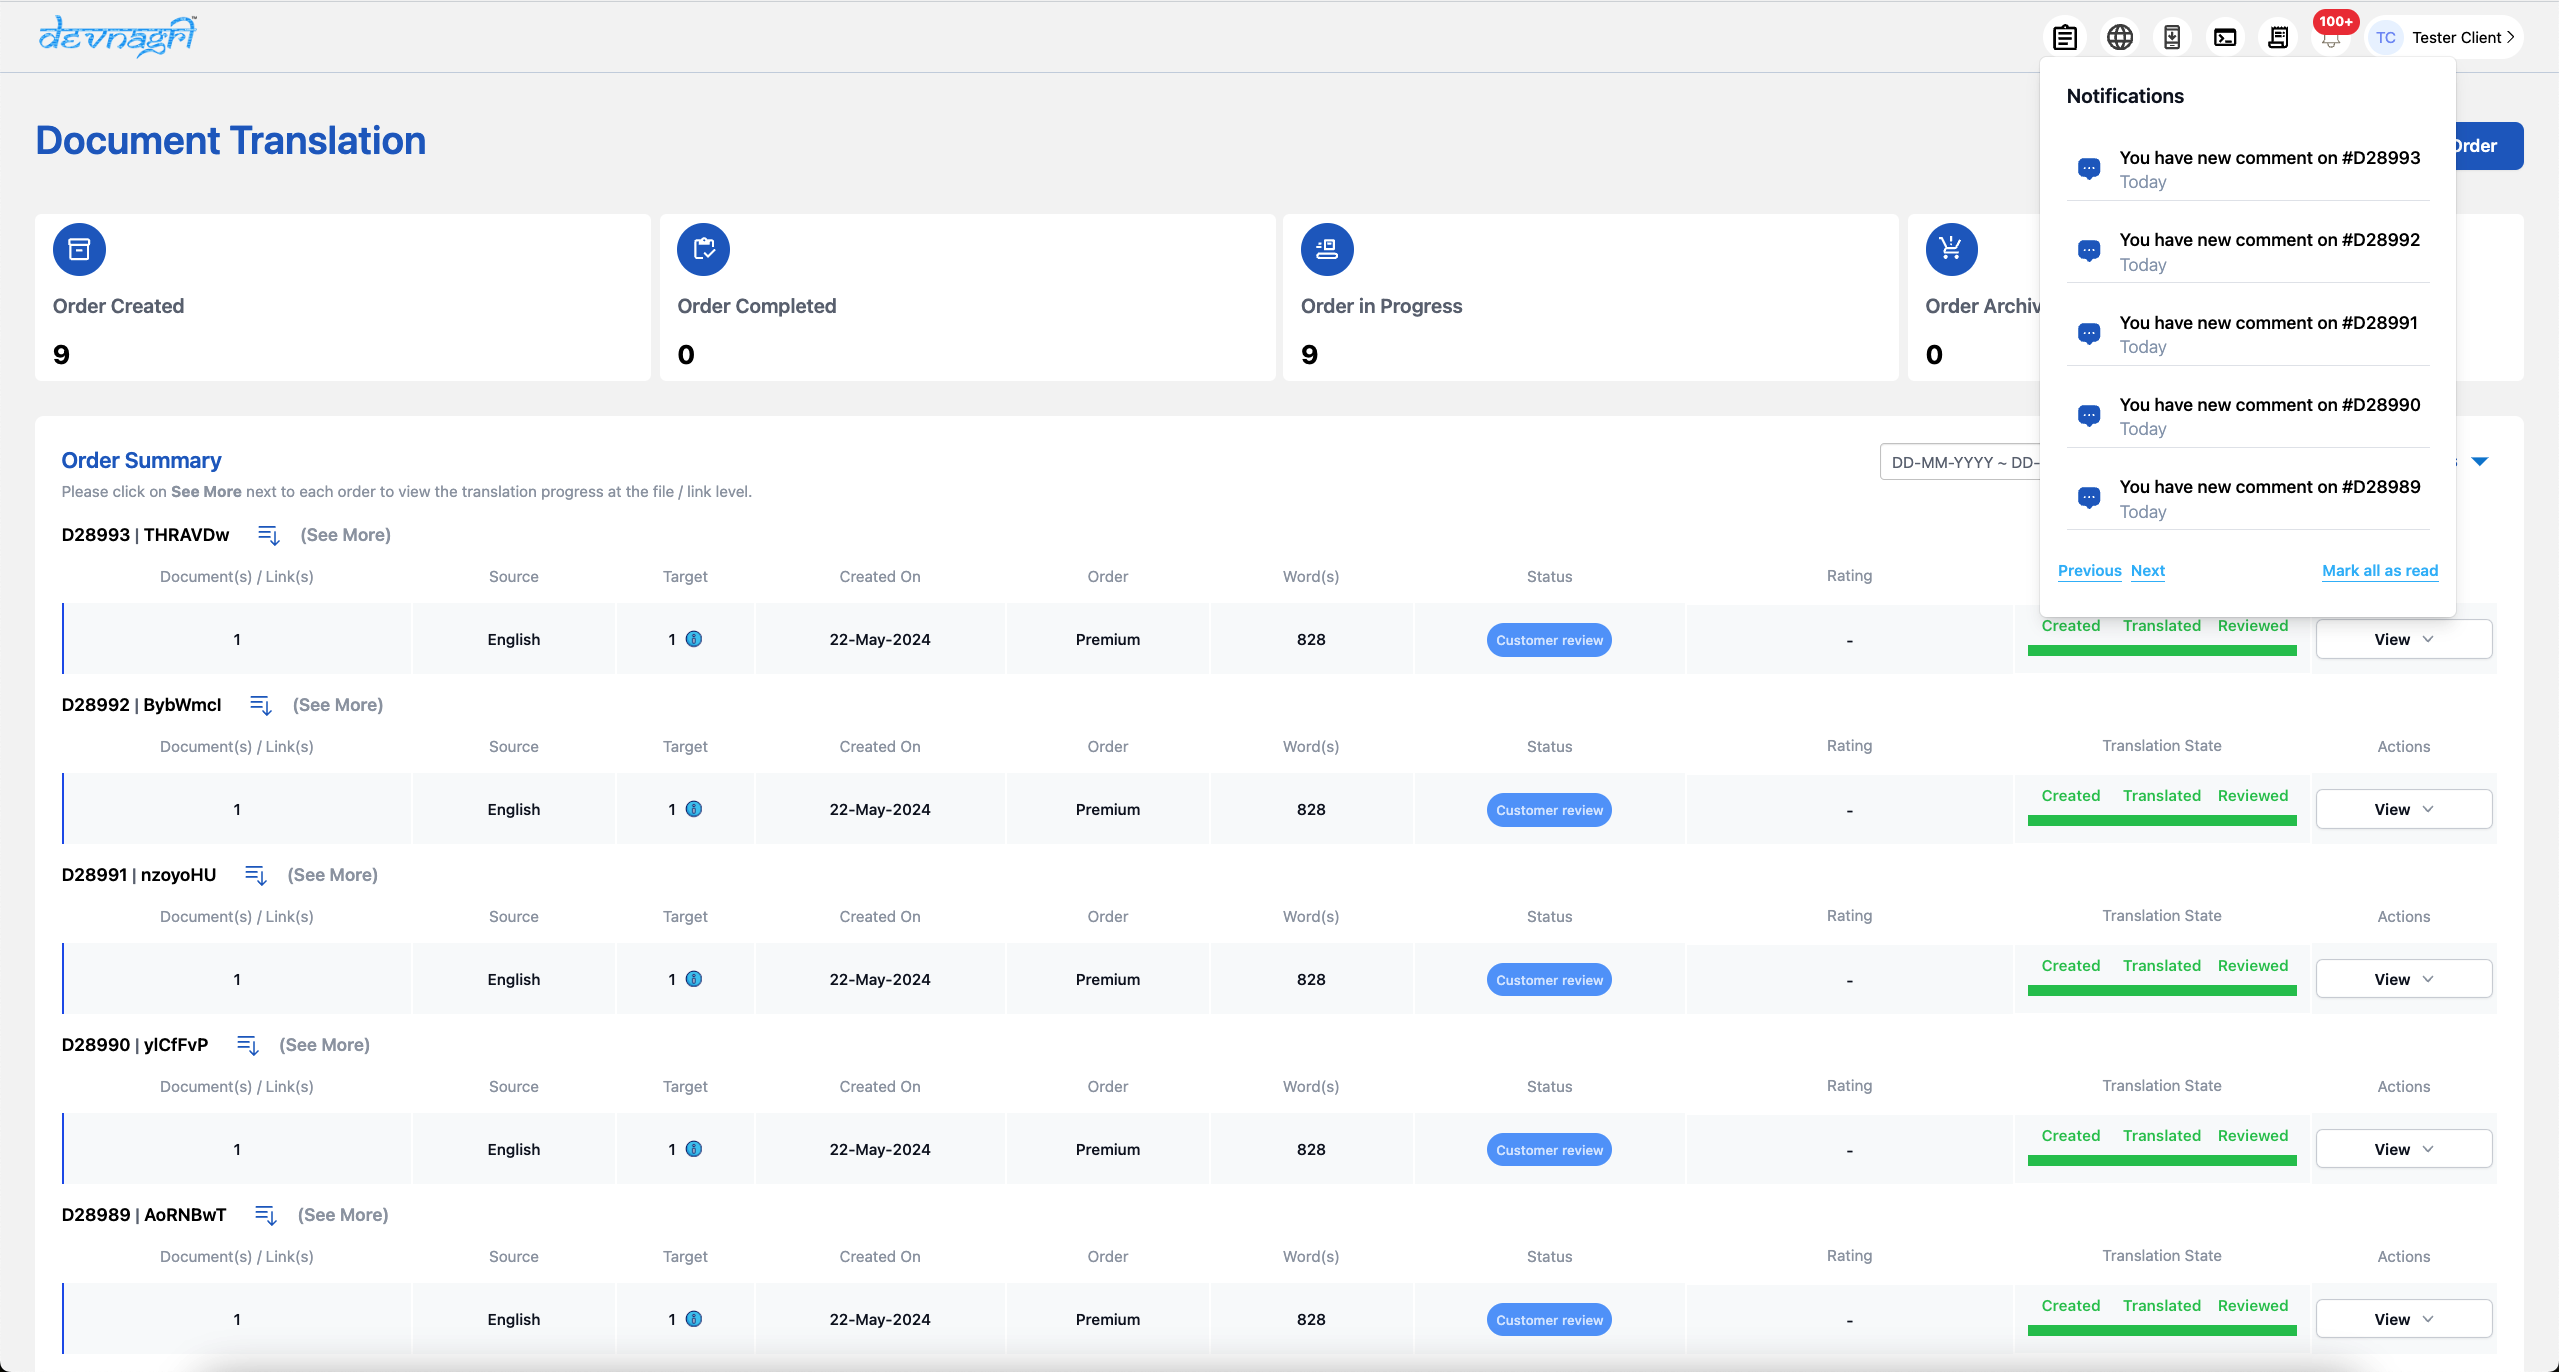
# Order Status
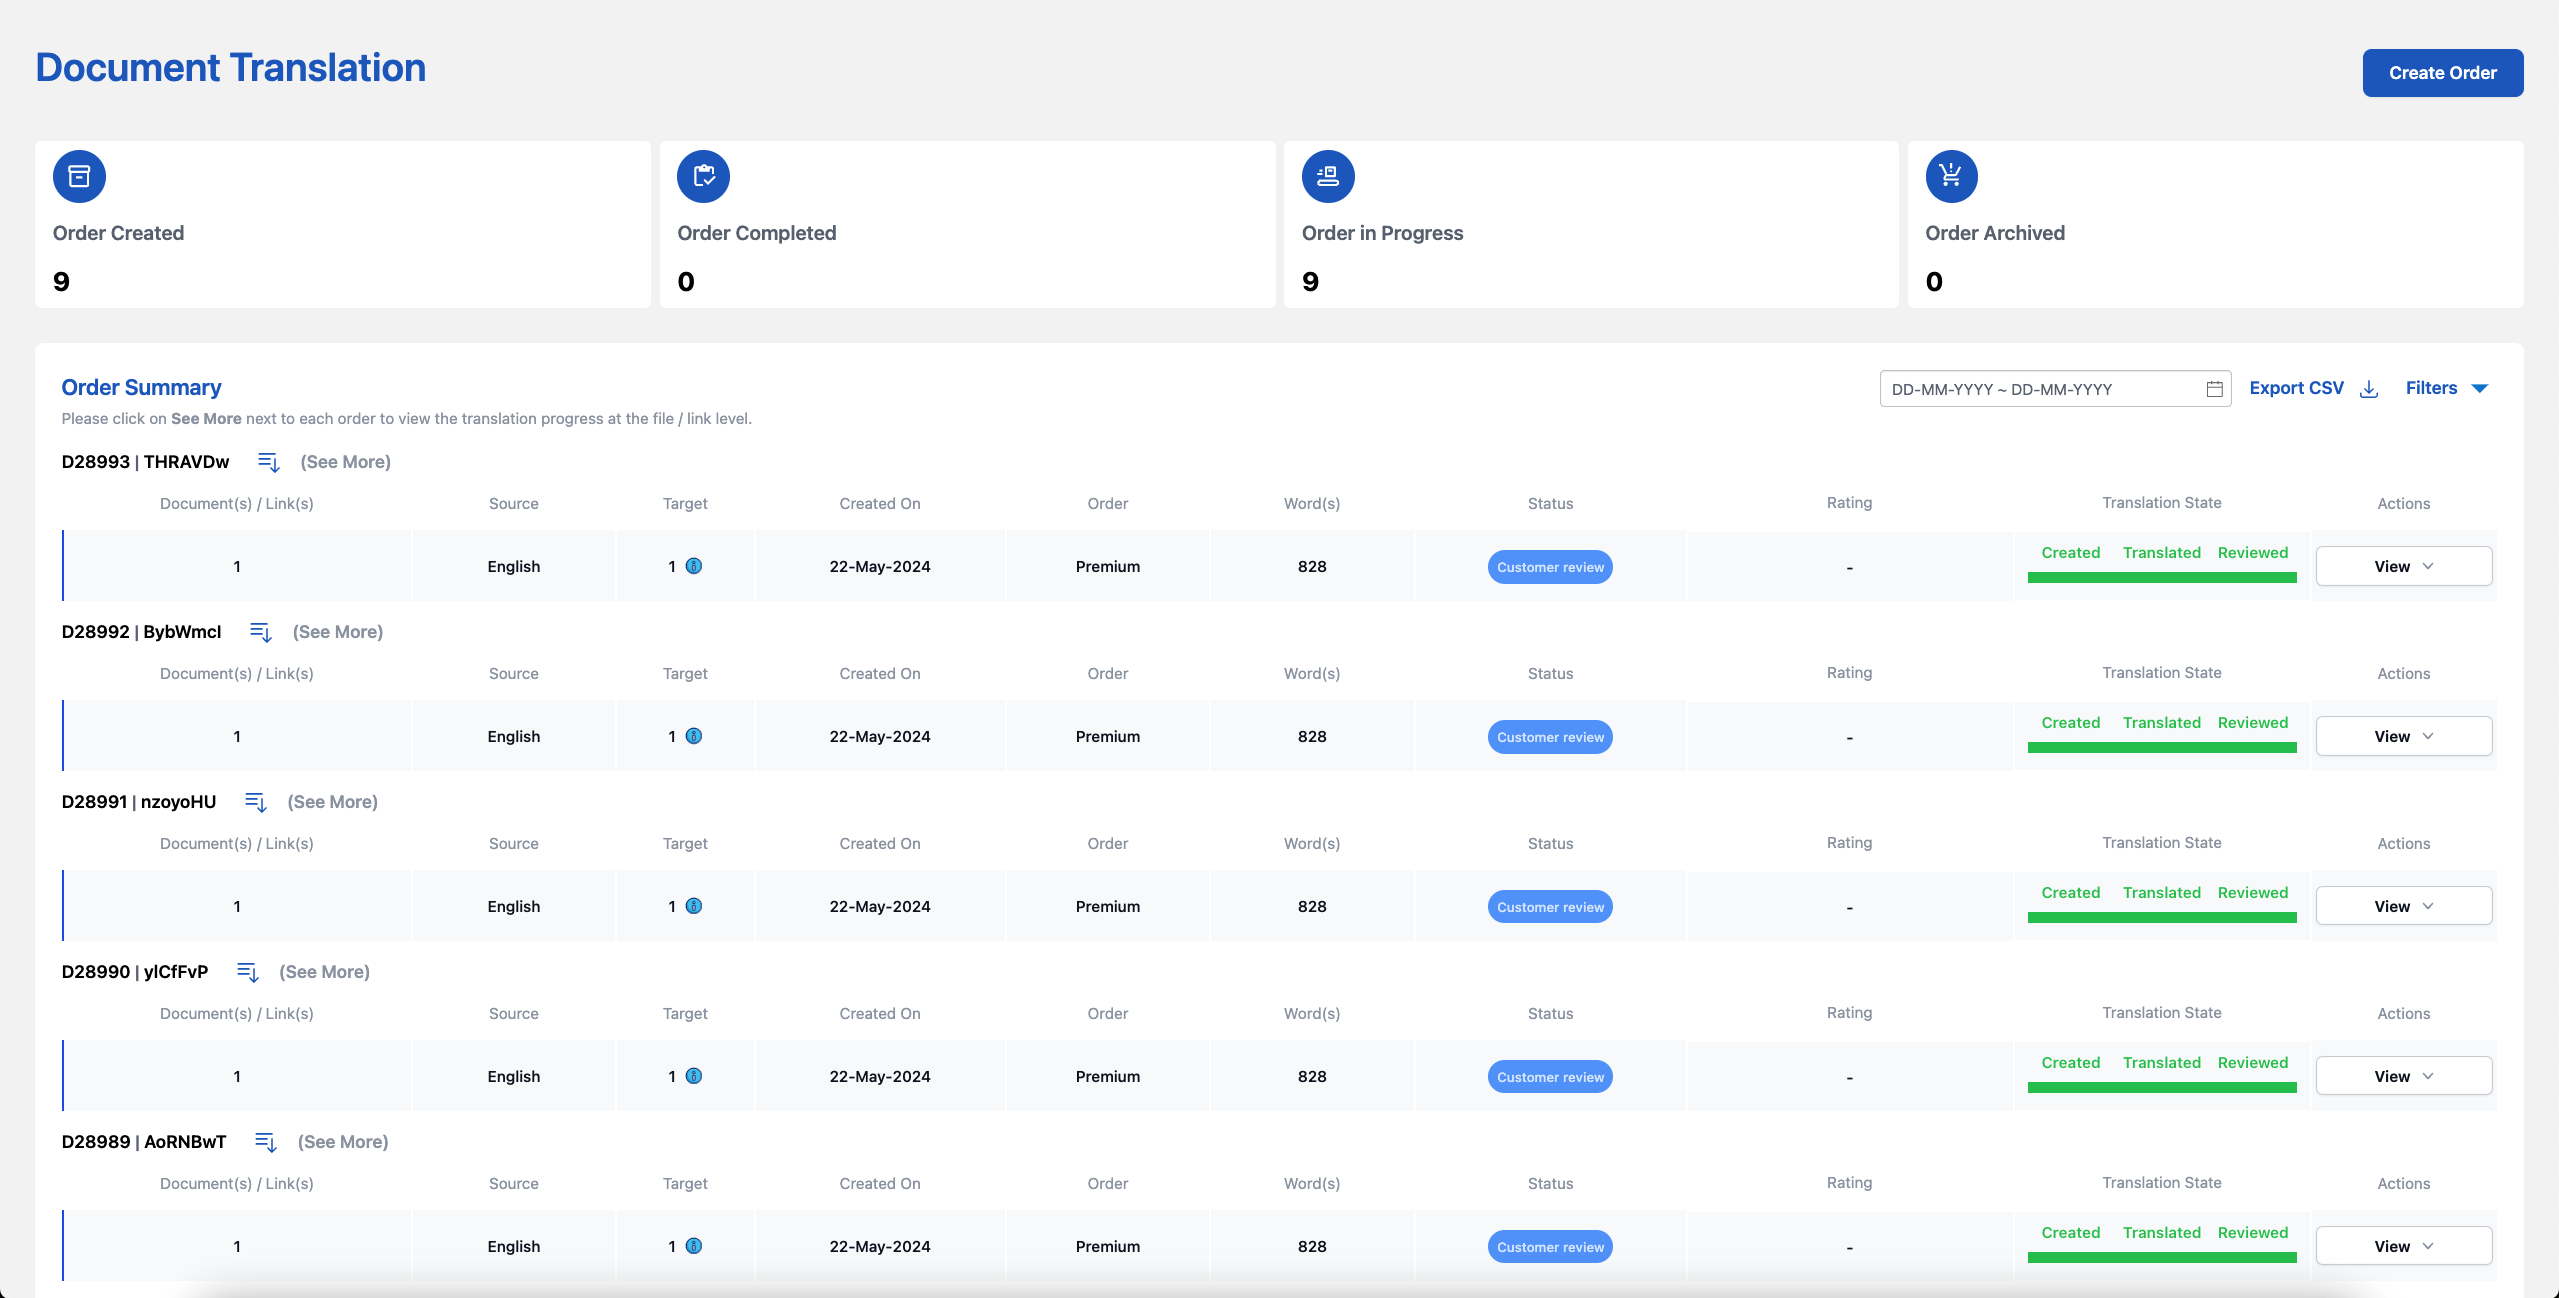
To check the order status user needs to click on the order button in the navidation bar. On the landing page the order listing will be available with all the details. The “Status” column shows the current status of the order. The different options can be:
Processing: This order is being processed.
Unassigned: This status indicates that translators are yet to be assigned for the order.
Not Paid: In case of transaction failure or unpaid order this status is shown. User can pay by selecting option from “Action” tab.
Assigned: Once the translator is assigned the project status becomes “Assigned”
Pending Review: If the user chose the option to get the review along with translation then “Pending Review” comes after the completion of translation.
Customer Review: Customer has to check and confirm the order once it is done from our end. Till then the order is in "Customer Review" state.
Completed: After the customer marks the order as completed the status is changed to “Completed”
Archived: User can archive the order if it's no longer required to be shown in the list of active orders. User can use option from “Actions” tab
# Actions

For the project statuses shown there are different actions that user can take, these are:
View: To check the order details, file-wise and language-wise word counts and the bifurcations of the translation type of each segment.
Translate: To check the current progress of translation, user can choose the option of translate. User can also review the translation and accept the work by using this option.
Archive: User can archive any project using this option. The archived project will be removed from translation process but will be available in the user dashboard.
Download File: User can download all the files of the order with translated content using this option. The files will in the same format as the original uploaded file.
Email Files: User can get all the files of the order with translated content on their registered Email address using this option. The files will in the same format as the original uploaded file.
Get as Excel: User can download all the files of the order with translated content using this option. The files will be available in the xlsx format with source text in one column and its corresponding translations in the other column.
Pay: This option can be used to pay for unpaid orders. It will not be shown for paid orders.
# User Dashboard
User dashboard holds all the information about the number of projects ordered, translation status, profile, bill etc.
# Navigation Panel
The various options under Navigation panel are;
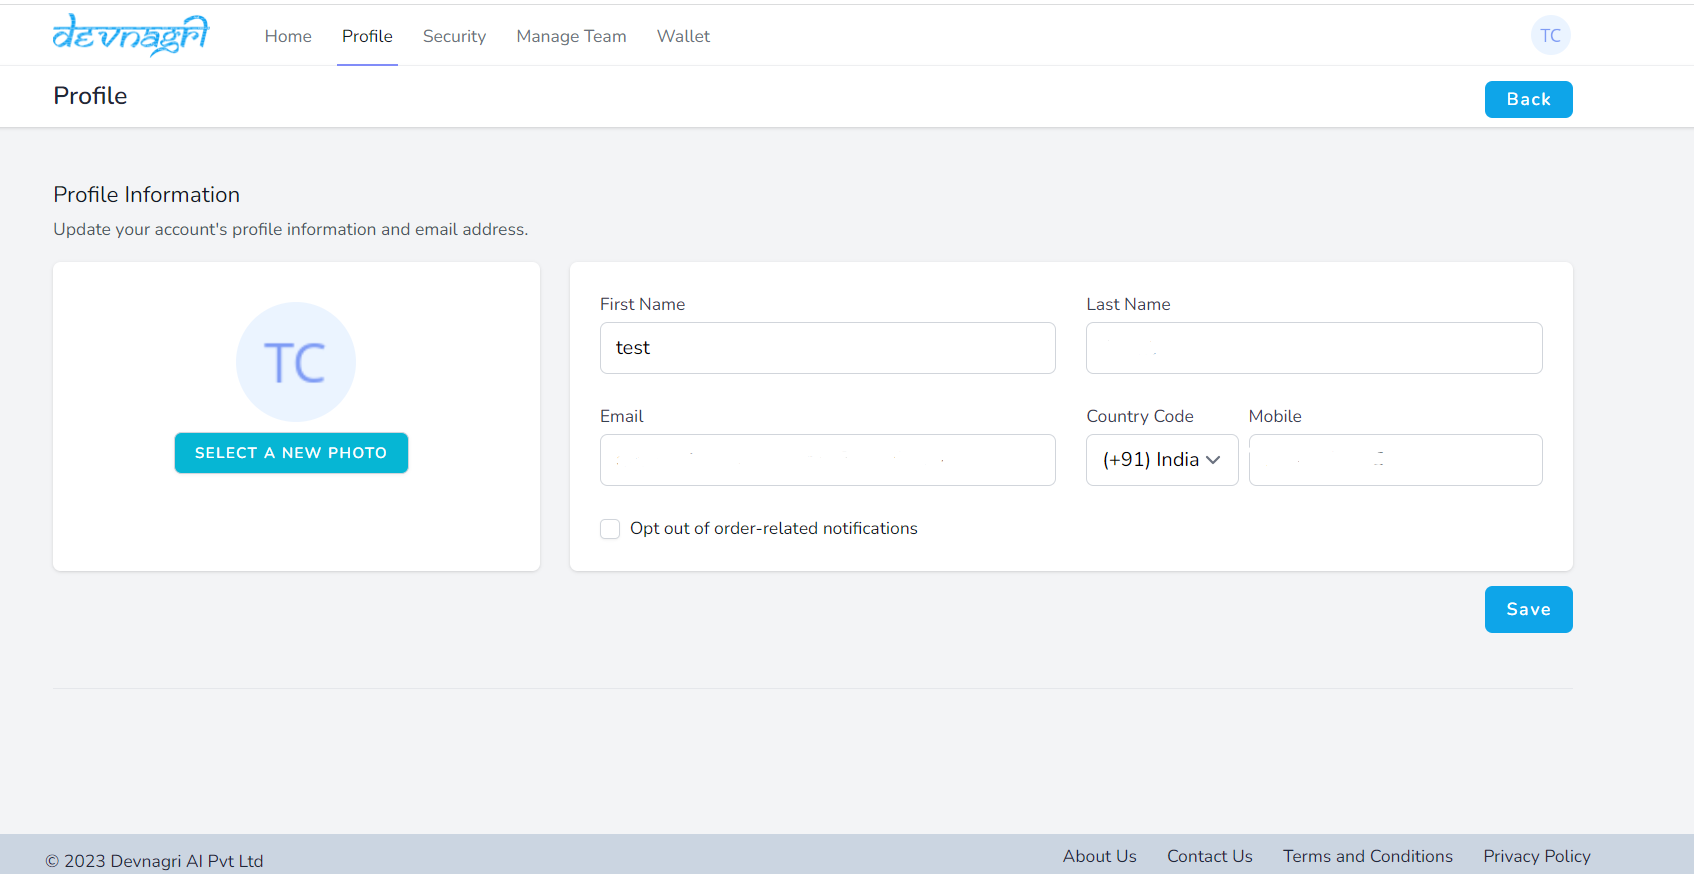
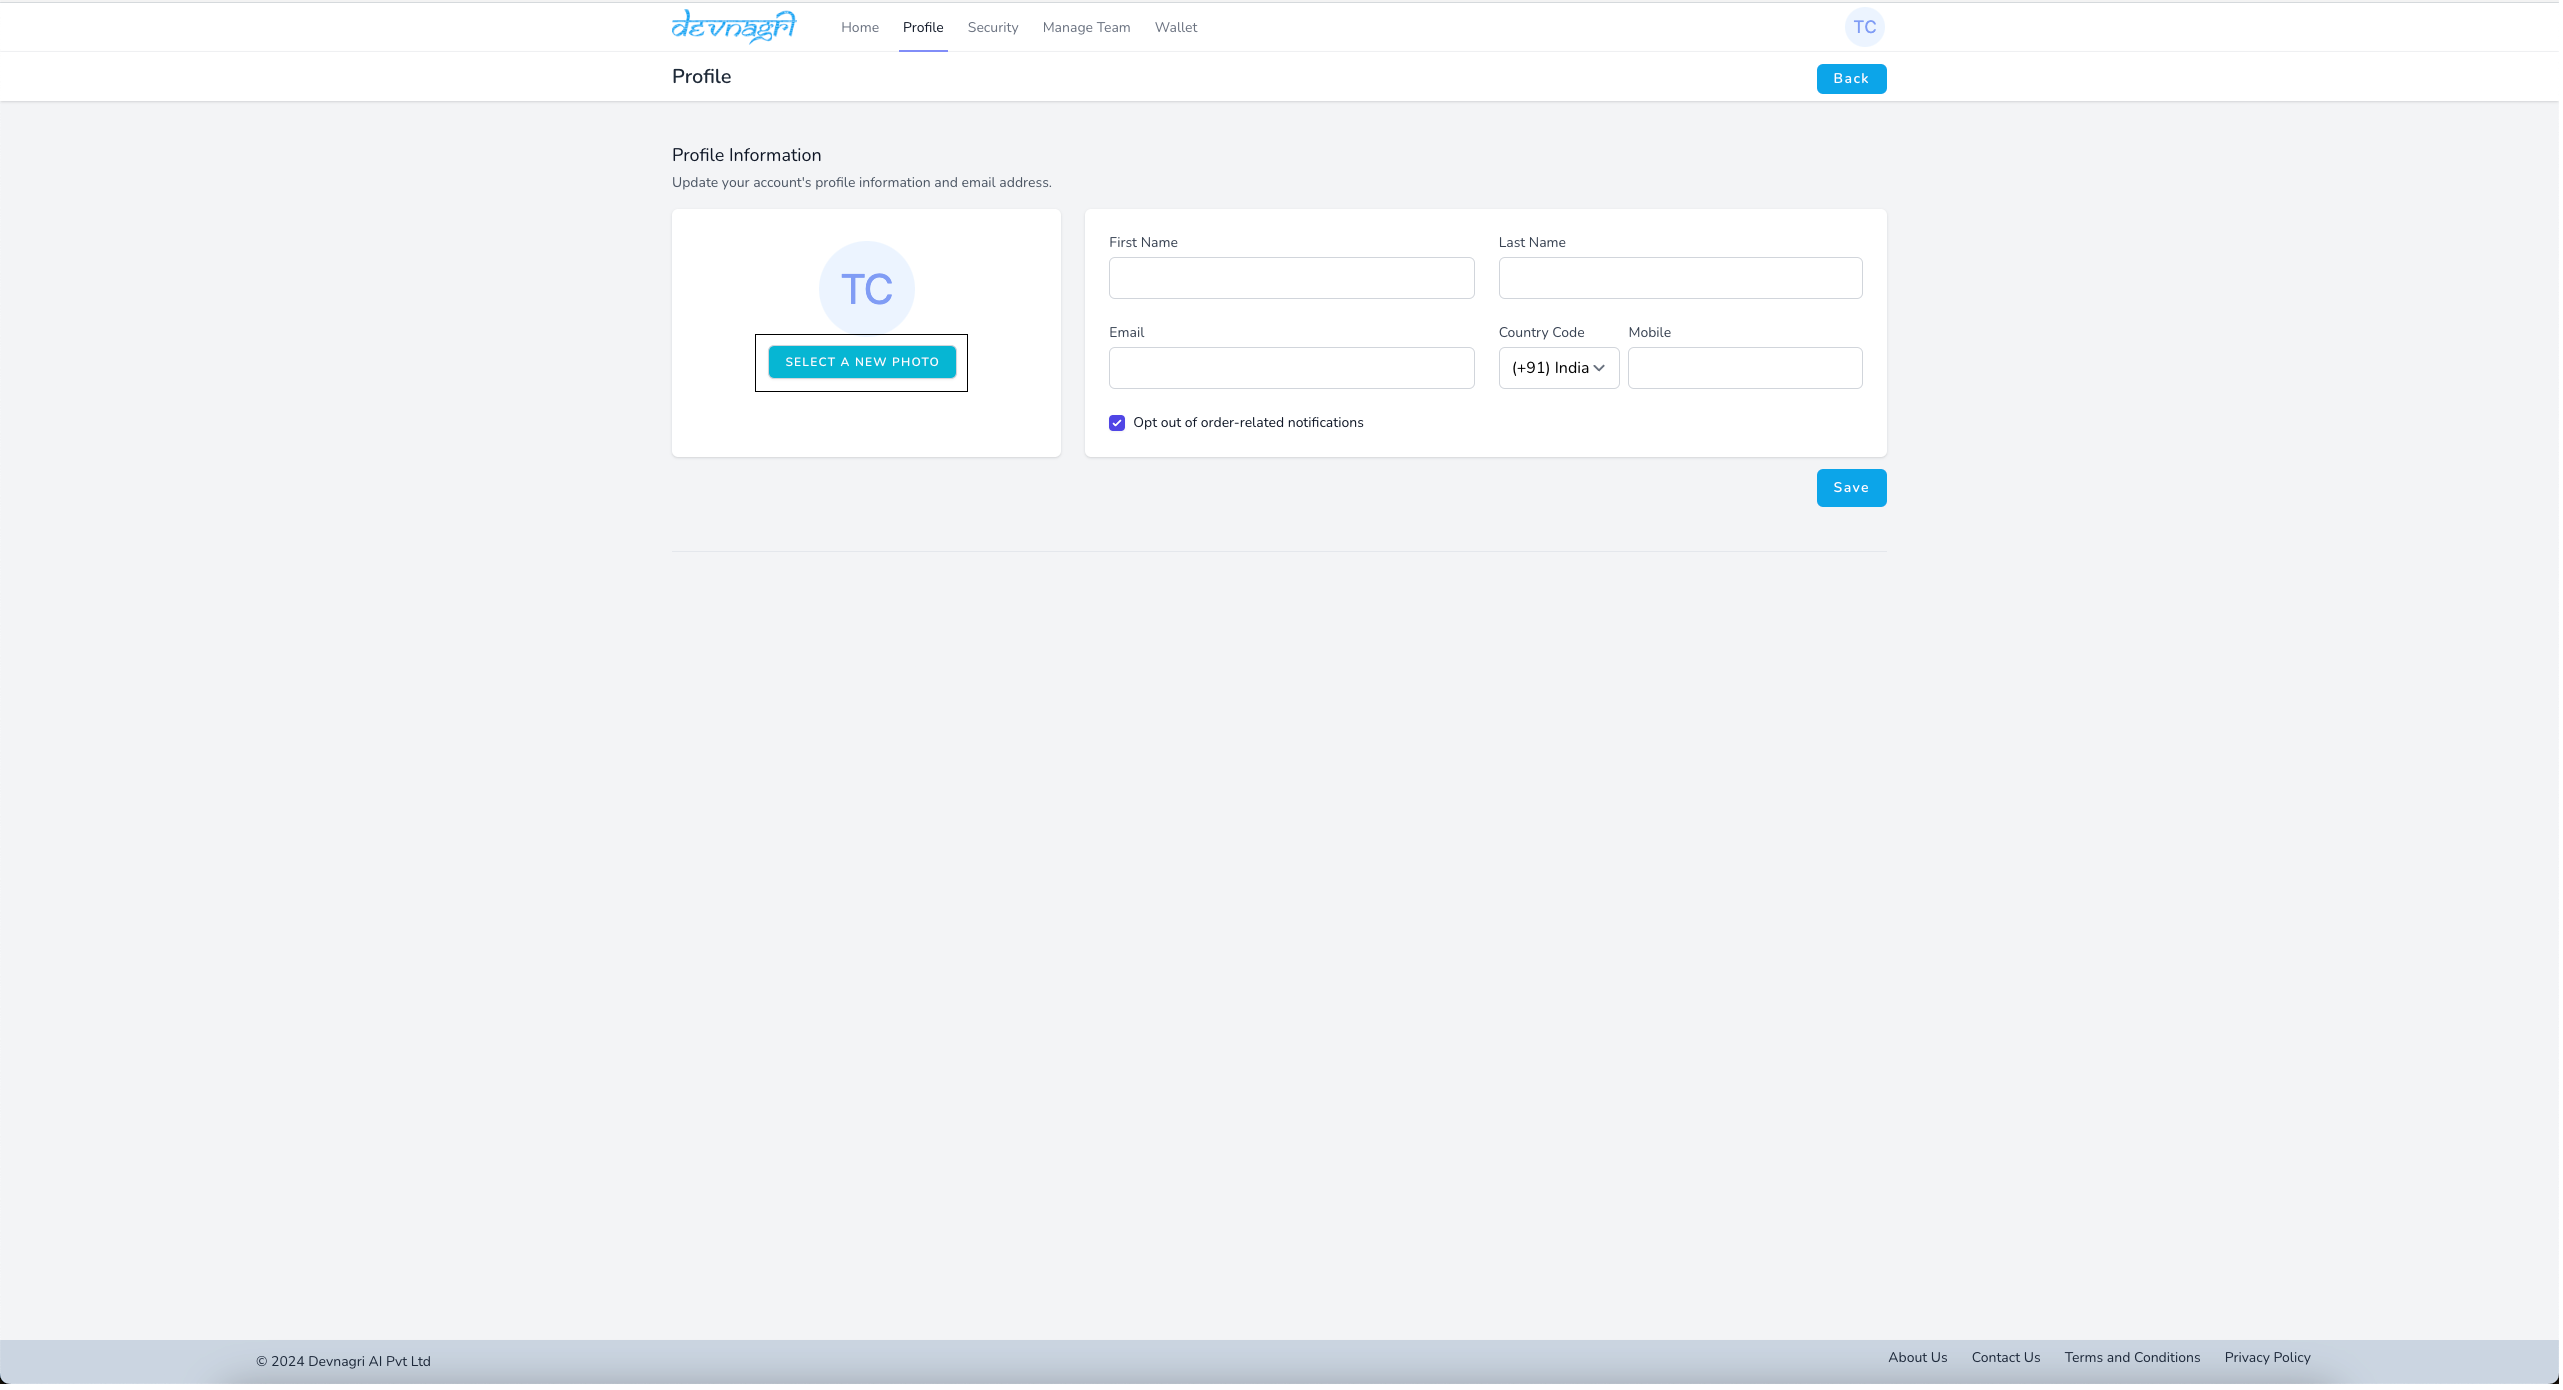
# Profile
Top-right corner has a profile section that shows the customer's name and registered email address below which there are:
- Account Settings: It holds different sections to update the personal profile of the customer.
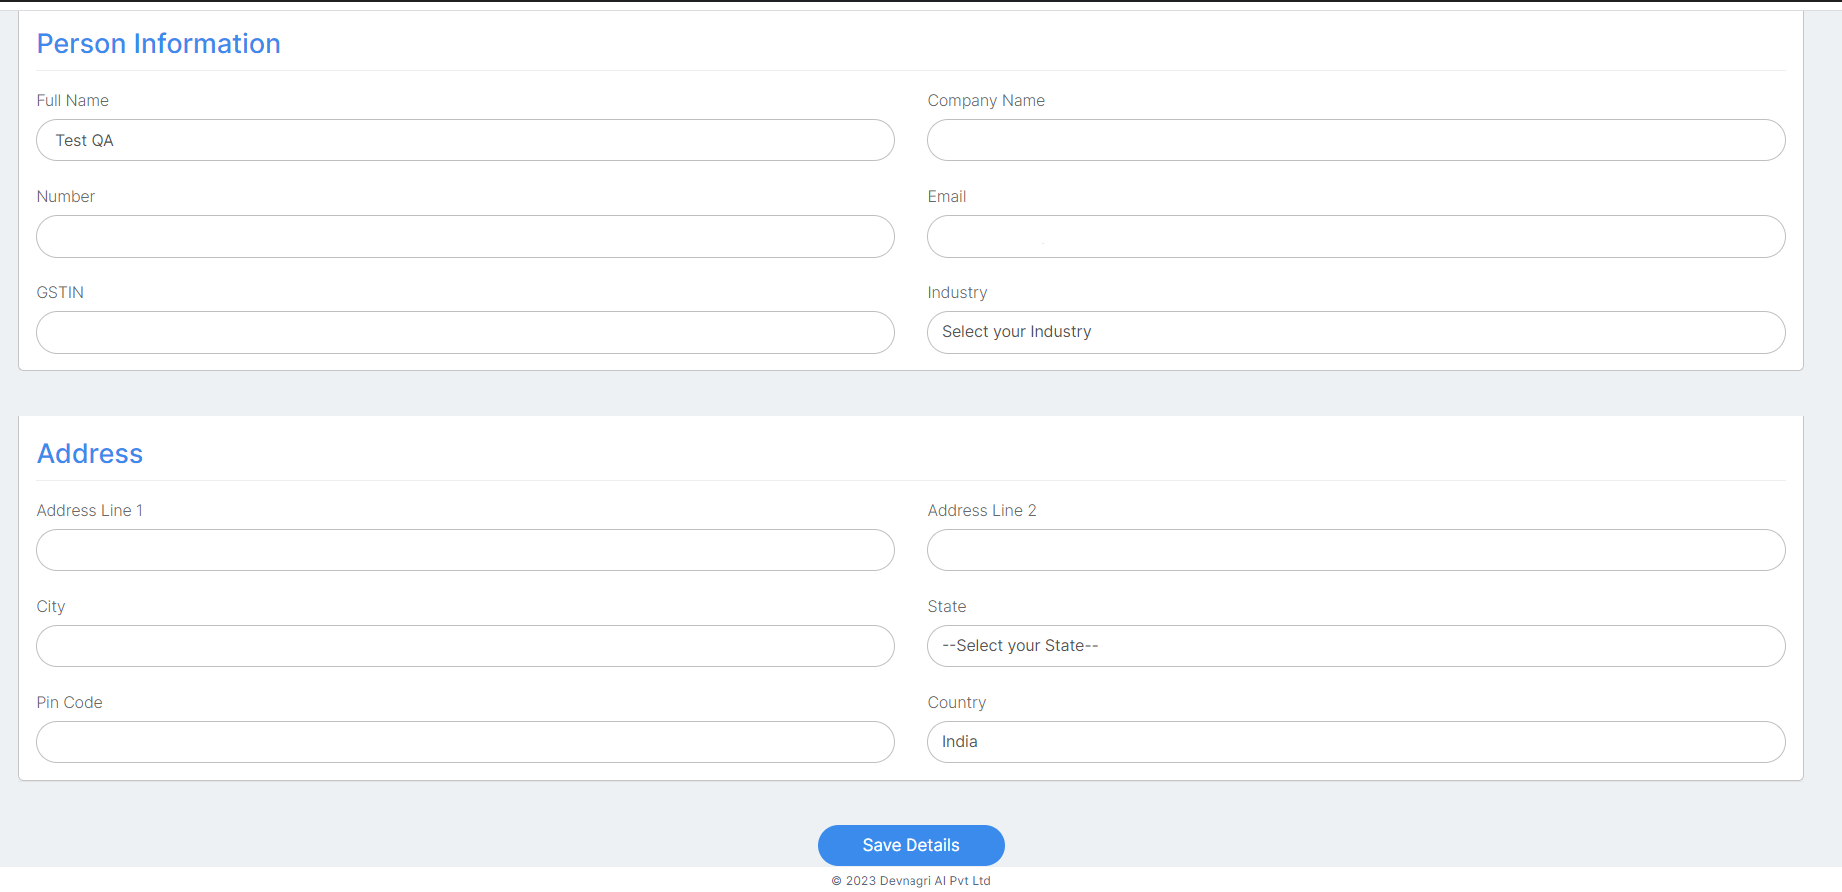
- Billing Details: Information such as Billing Address, GSTIN are stored here.
# Notifications
This tab shall blink whenever any new event happens with the project. For example, when the translator submits the project for review.
# Orders
Using this menu user can check out all the orders (current and previous) along with payment status.
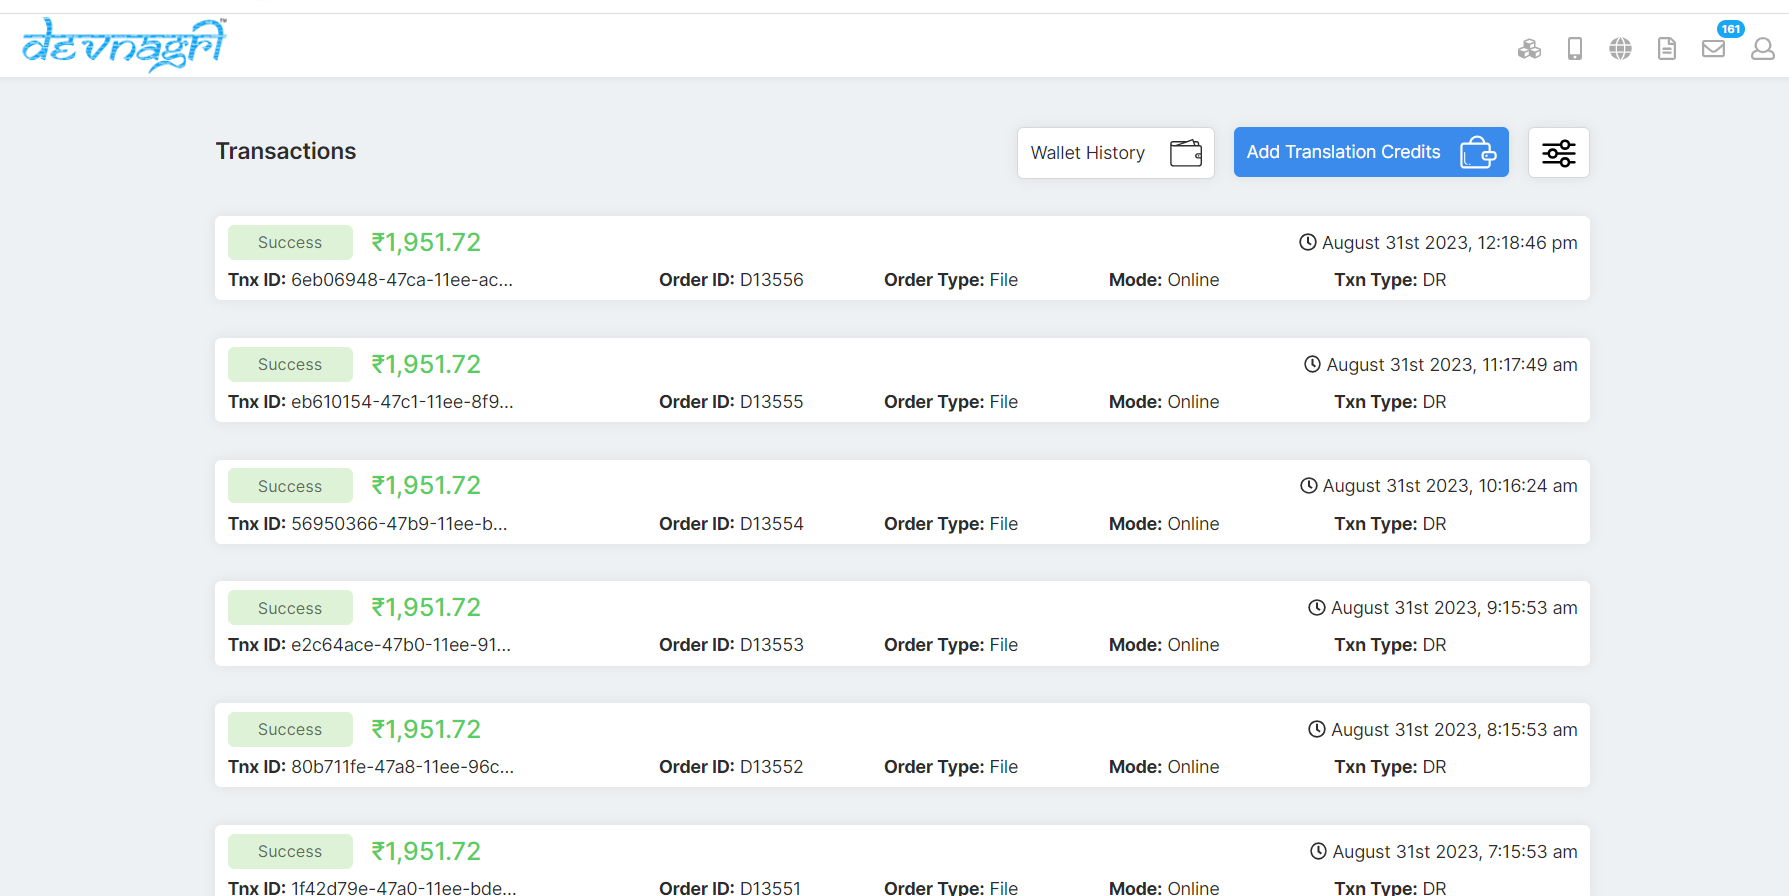
# Transactions
It holds information about all the transactions made by user.
# Customer Dashboard
# Add Picture
User can add a profile photo for display purpose using this option.
# Translation Credits
This is a premium service, pre-paid wallet that can be used by the customer to pay for any premoum translation orders.

# Buy Credits
Using Add Balance option, a customer will be able to buy Translation Credit credits in the account.
